


When modifications are made to the design of a web or mobile app, there’s a risk that user interface elements could be affected as well. Visual testing is a strategy used in software testing to assure an app's visual integrity through its user interface.
Basically, it involves comparing images of an app's interface (web or mobile) or any of its visual components at different states of development or releases to detect unwanted graphical changes. This is where Katalon and its automated visual testing capabilities enter the picture. With the platform's full potential, you can detect even the smallest changes. This speeds up the verification process and saves testing time.
 How does visual testing work with Katalon?
Before we dive into detail, we should introduce some basic terms and concepts that are commonly used.
Baseline: A baseline is a starting point that will be used as a reference to perform a comparison. It defines how the page (or a certain component of it) is expected to look in the user interface. It serves as a comparative point during testing (you could say it is the expected result).
Typically, during the project’s first test run, where there is no previously created baseline, we use it to produce the first versions of these screenshots and start the visual testing cycles. Each baseline is given a unique name, which is used for visual comparison between screenshots.
Baseline collection: A baseline collection is a set of several screenshots used for a particular run. For example, a baseline collection may contain all the screenshots (baselines) that will be used in the next test run.
Checkpoint: A checkpoint represents a specific point in the test flow where a snapshot of the application (or any of its components) will be taken to check for changes or mismatches versus the established baseline. If the checkpoint differs from the baseline, there is a difference in the UI.
Comparison methods:
Katalon has three different comparison methods, each of them approaching visual testing from a different point of view.
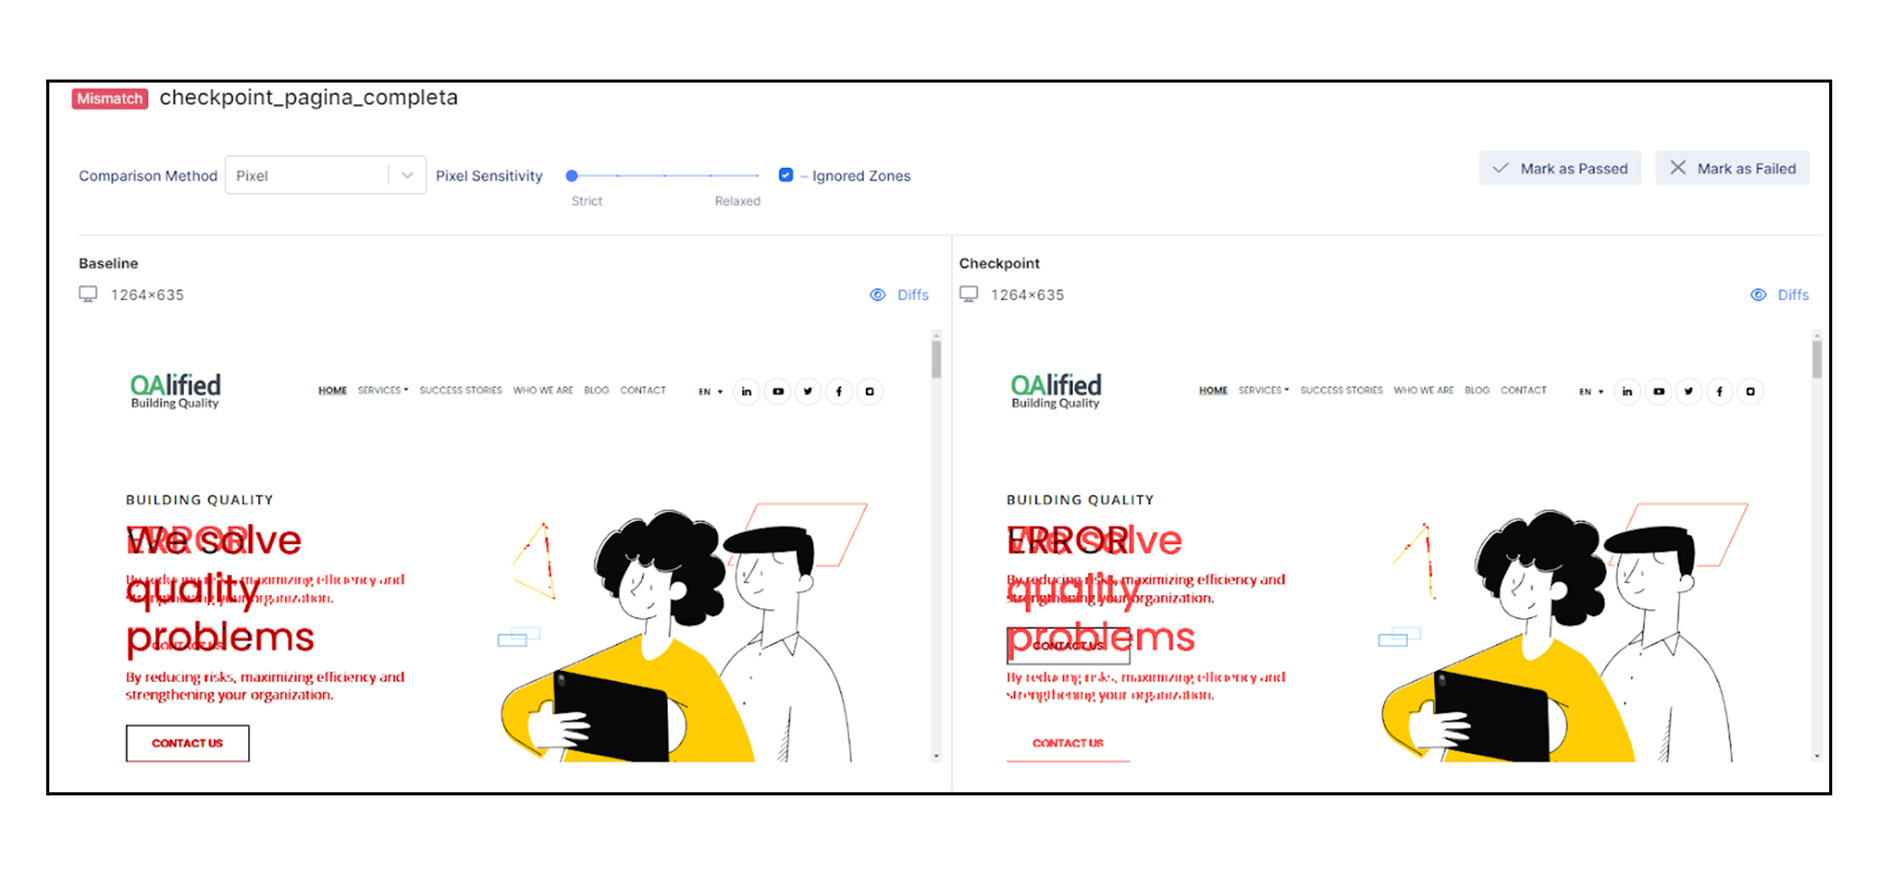
- Pixel-based comparison: This method performs a pixel-by-pixel comparison, i.e., it can detect any pixel difference between the baseline and the checkpoint.
Being so strict in the comparison often leads to many false positive scenarios, so the possibility to set a certain tolerance is required. Katalon provides the ability to adjust the tolerance threshold, allowing some flexibility when performing the comparison.
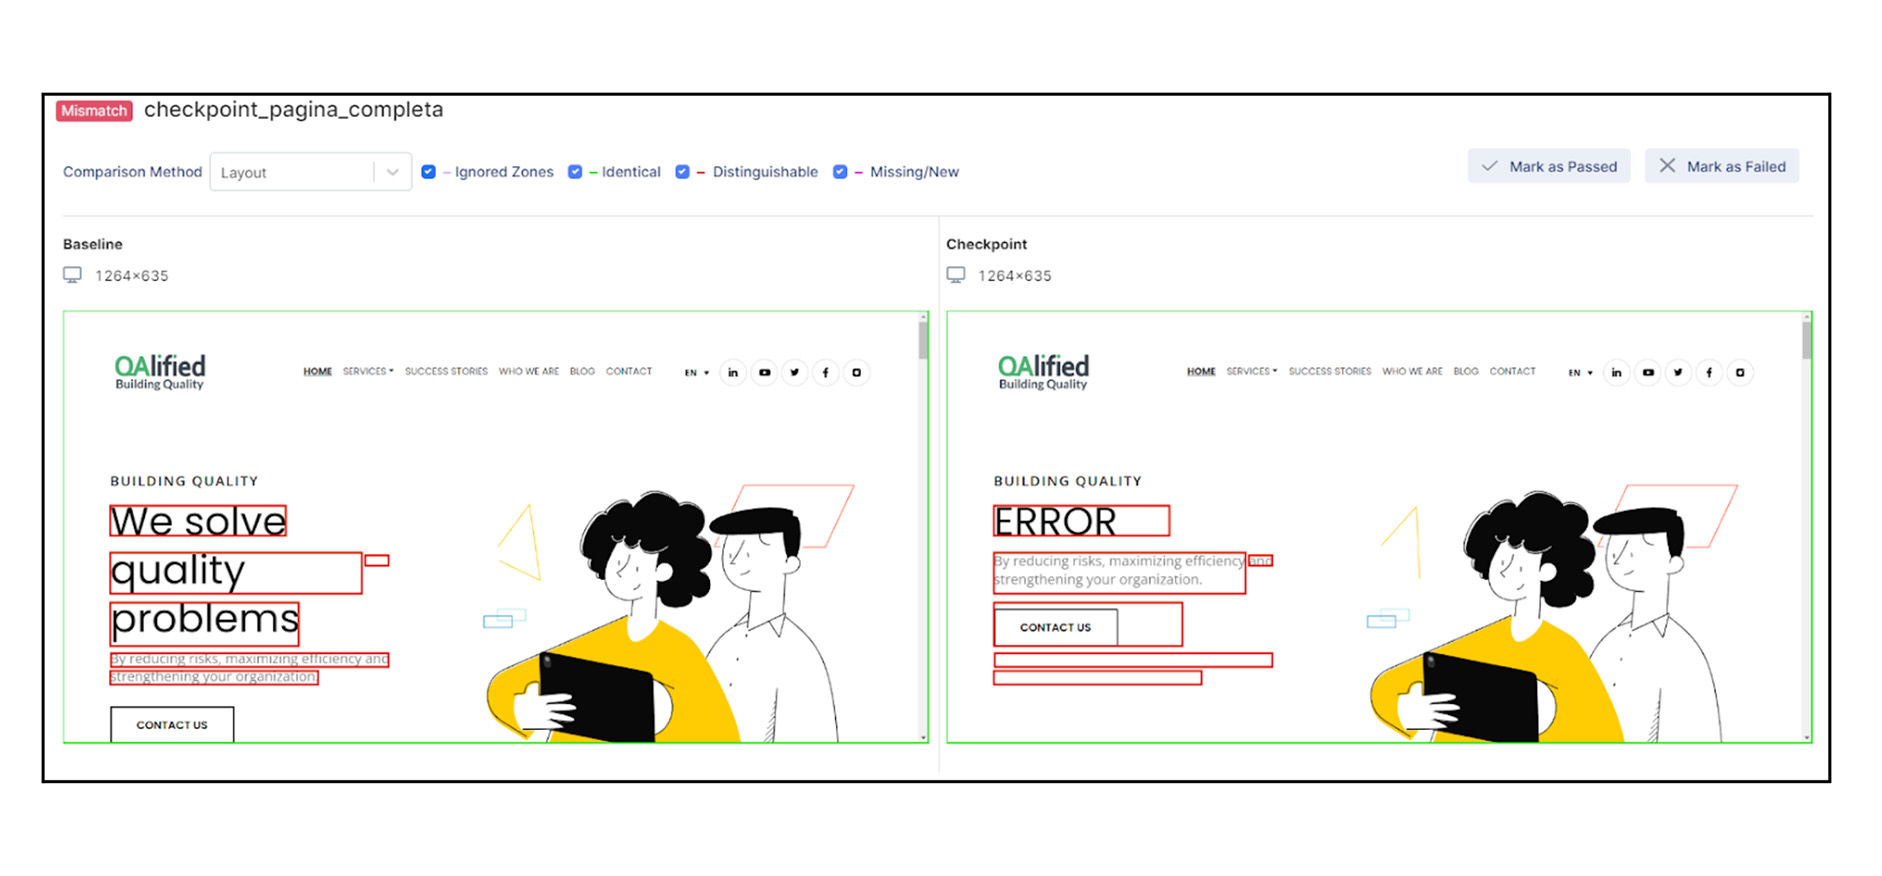
- Layout-based comparison: This method identifies and maps similar areas between the baseline and the checkpoint while highlighting the differences.
Katalon identifies and classifies zones into three types:
- Identical (green border): Shows the user interface zones represented identically between both images.
- Distinguishable (red border): Displays UI zones that appear mostly identical, but with some recognizable distinctions.
- Missing/new (pink border): Shows UI zones that exist in one but not in the other.
This method is useful to complete the differences identified by pixel-based comparison and to better understand how these affect the screen layout and its elements.
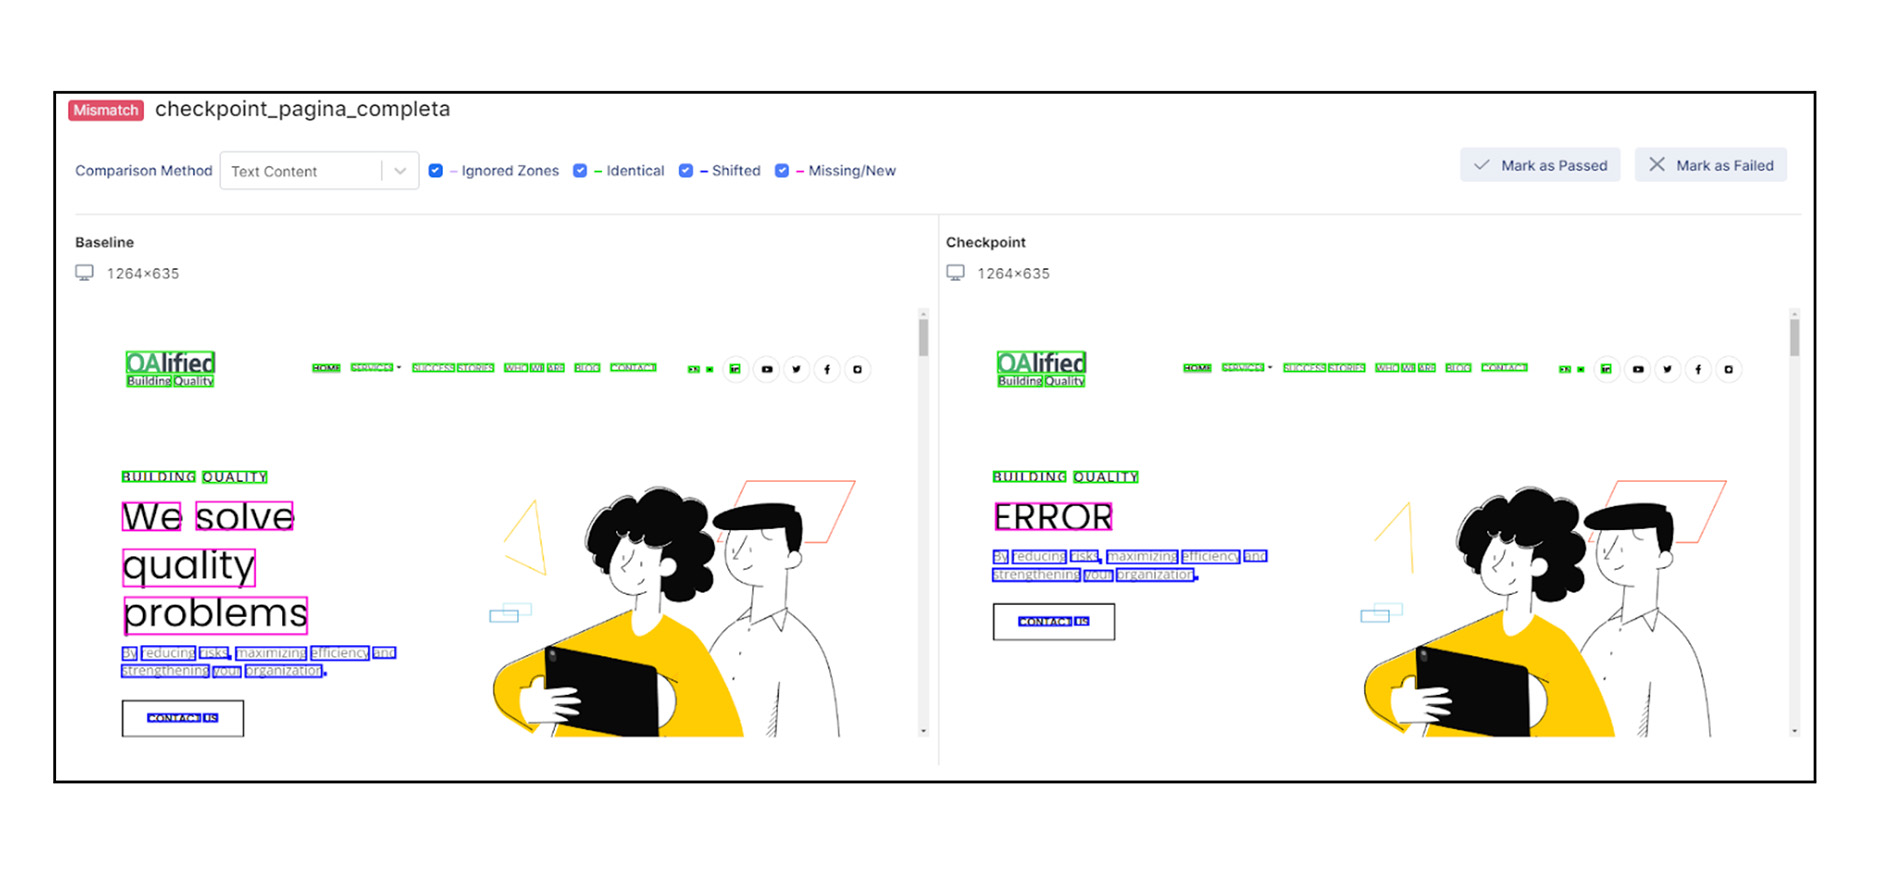
- Content-based comparison: This method identifies and analyzes text content differences between screenshots. That is, only text between the baseline and the checkpoint is compared.
Katalon identifies and classifies the zones (texts) into 3 types:
- Identical (green border): When the text is the same.
- Shifted (blue border): When the text is the same, but its position has changed.
- Missing/new (pink border): When there is text in one screenshot, but not in the other.
This method is useful when there is a lot of text on the pages. It helps users to review and prioritize critical text changes that need immediate attention.
Visual testing with Katalon into action
Once we have explained what visual testing is and how it is carried out, we will go through a series of steps necessary to implement visual testing with Katalon.
Next, a detailed description is given about how to perform Visual Testing on a web page using Katalon, in different browsers and screen sizes, both desktop and mobile devices.
Downloading and installing Katalon Studio
First, you need to create a project in Katalon Studio, which requires downloading the tool from the official Katalon website according to the operating system you are using. To use Katalon Studio, and the rest of Katalon products, you must have an active account. For this, you can click on the “Sign Up” option or access directly from the following link.
Once you have downloaded and installed Katalon Studio, it will prompt you for activation by logging in with a Katalon account. After activation, you can start using the software. No enterprise license is required, but when running visual tests, they will require a Katalon Platform paid license.
Creating the project in the Katalon Platform
While Katalon Studio allows you to create automated scripts for the visual tests, the Katalon Platform (formerly known as Katalon TestOps) will allow, for instance, to use the visual testing and screenshot comparison features.
To do this, it is necessary to create and link the local project in Katalon Studio to a project in the Katalon Platform, so that the execution data, as well as the baseline and checkpoint collections, are uploaded to the platform for processing.
The first step is to create and configure a project on the Katalon Platform. This requires logging into the web https://analytics.katalon.com/login with the same Katalon account used to activate Katalon Studio.
In the upper right corner, by clicking on the configuration button, you can access the option for managing projects (Project Management).
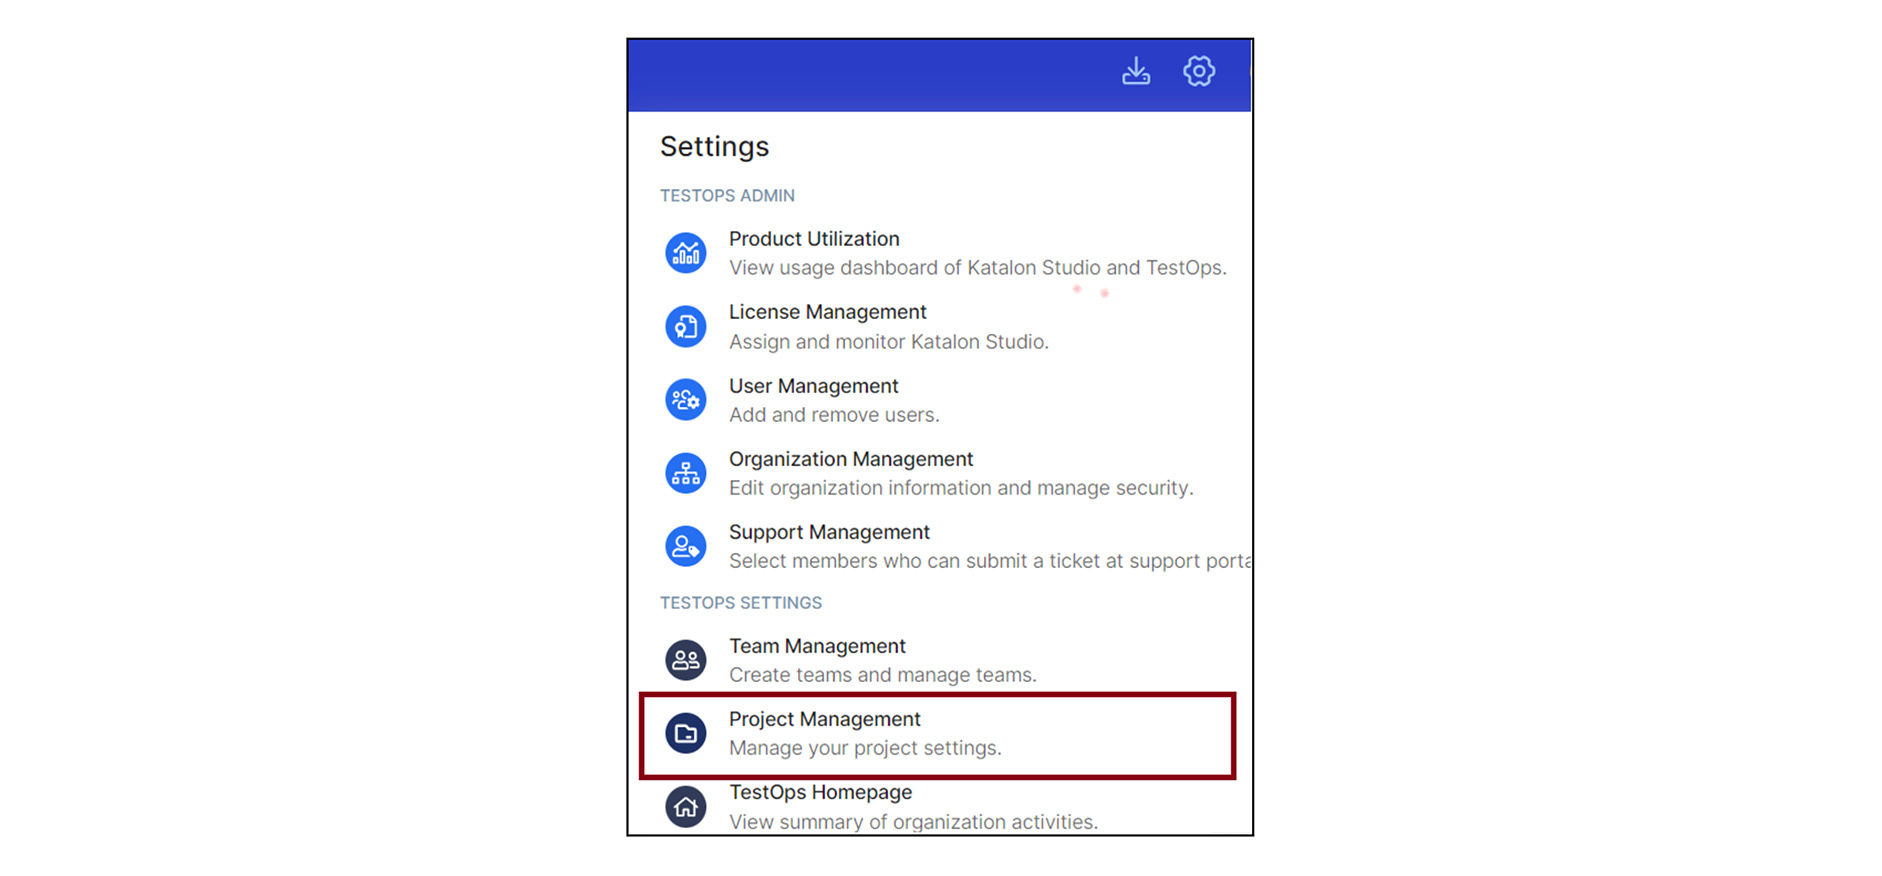
Upon accessing it, a new project must be created. Follow the steps and fill in the requested fields.
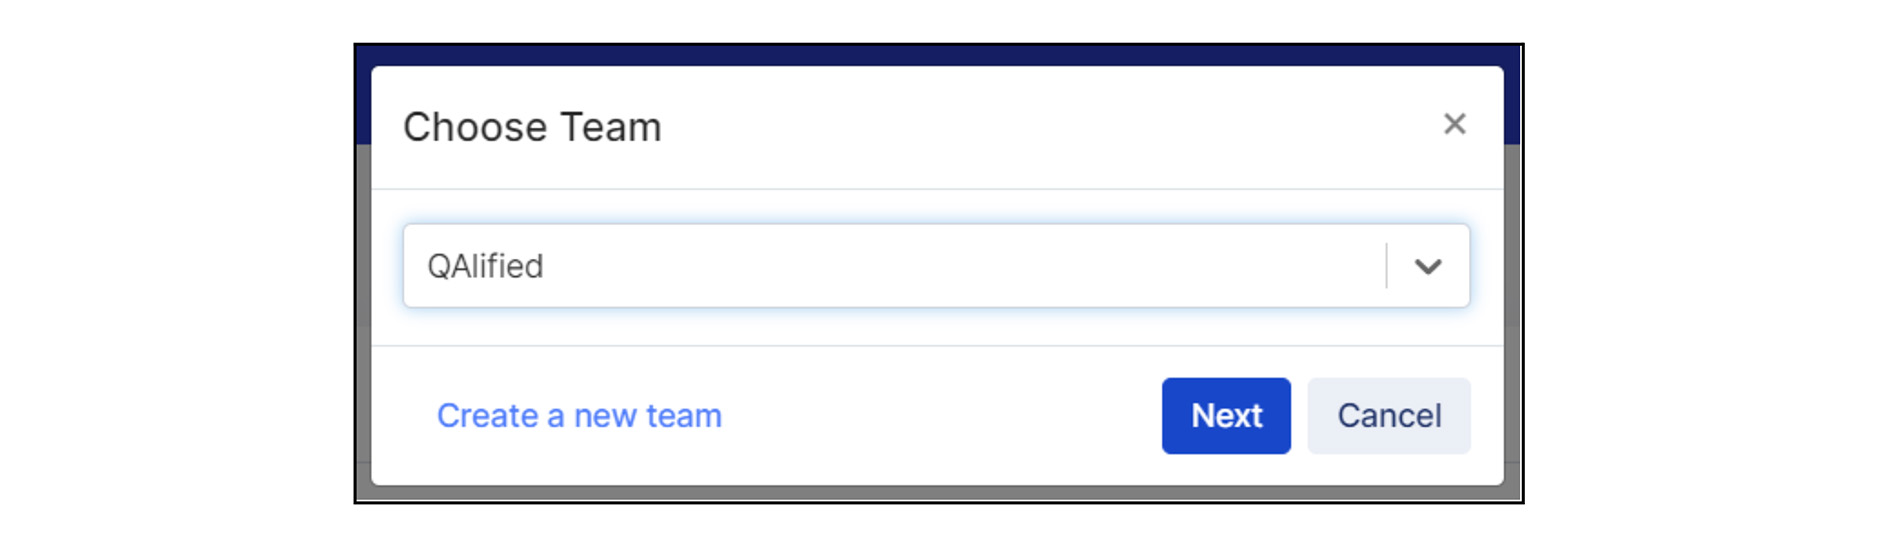
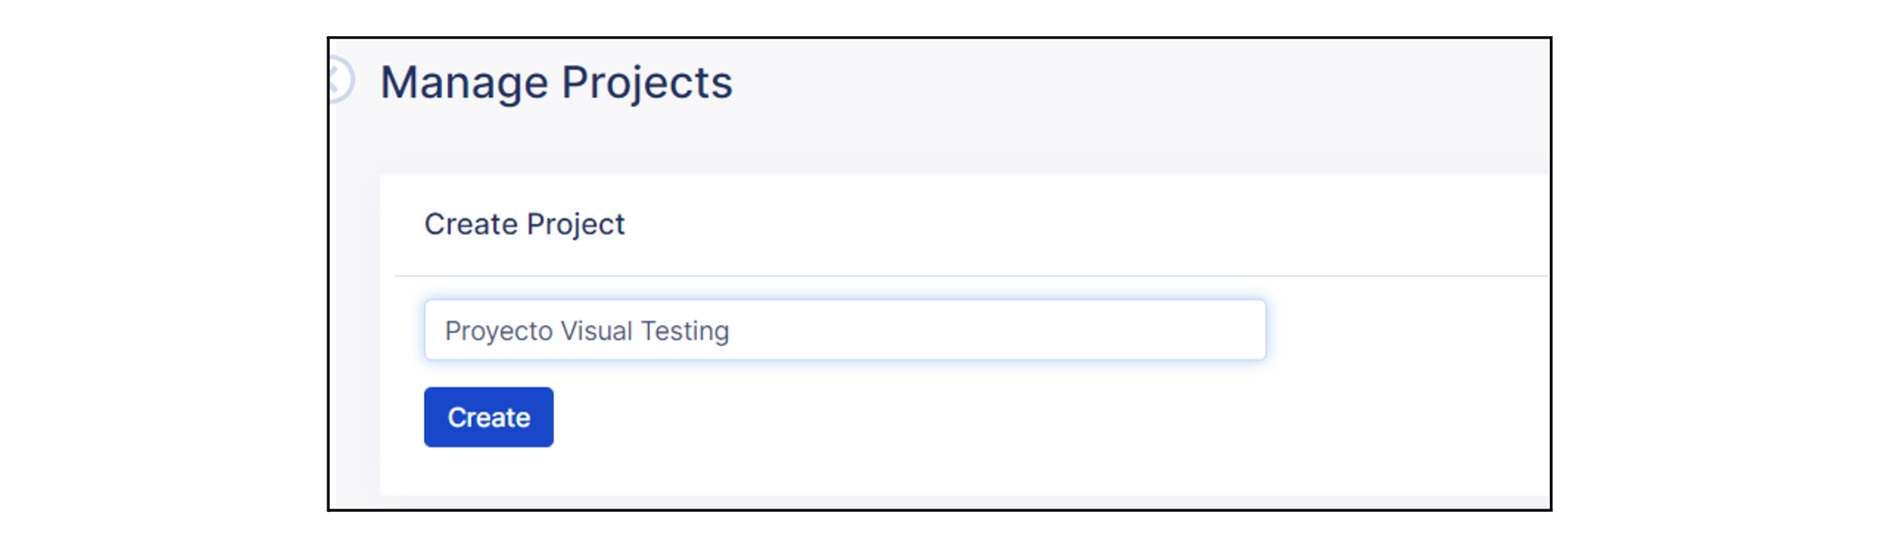
You will have to select the work team (or create a new one if applicable) and then indicate a name for the new project.
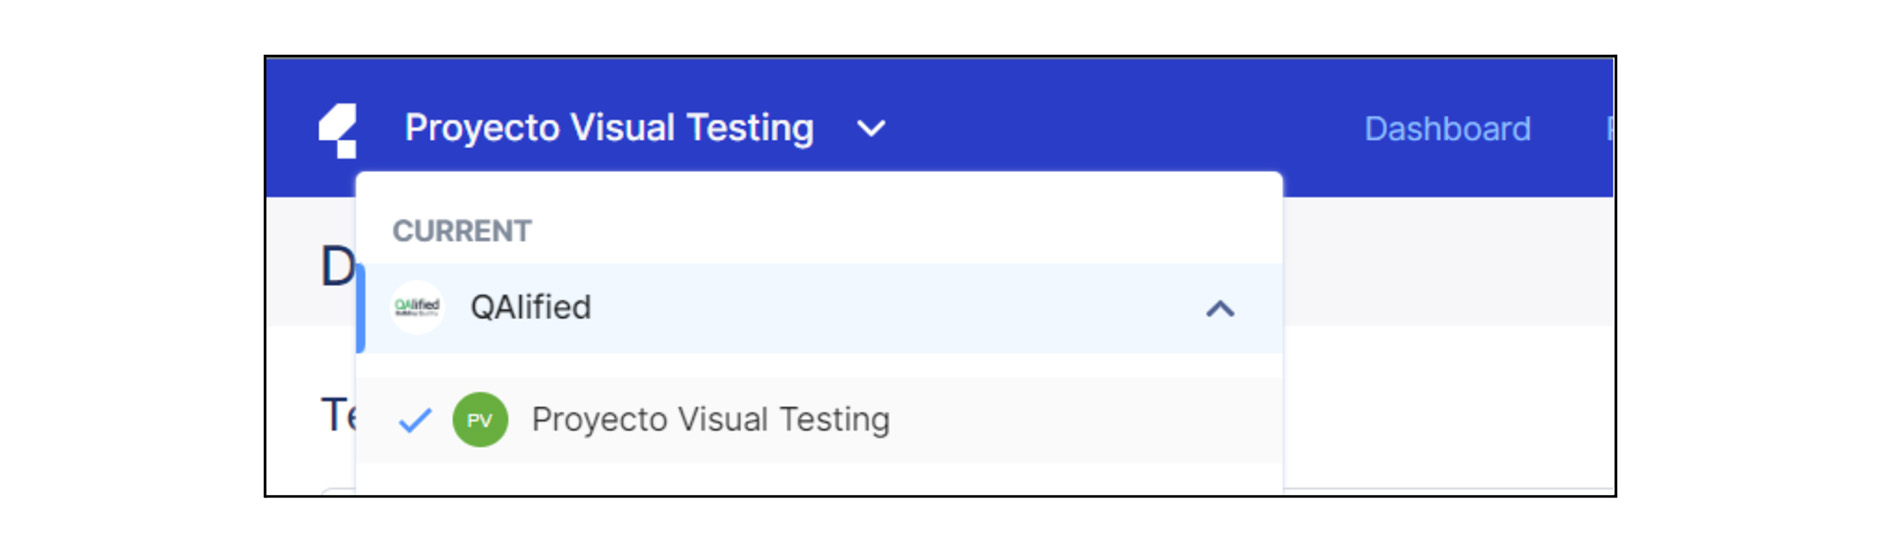
After creation, the new project will be visible within the organization’s node in which you are working, as shown in the following image.
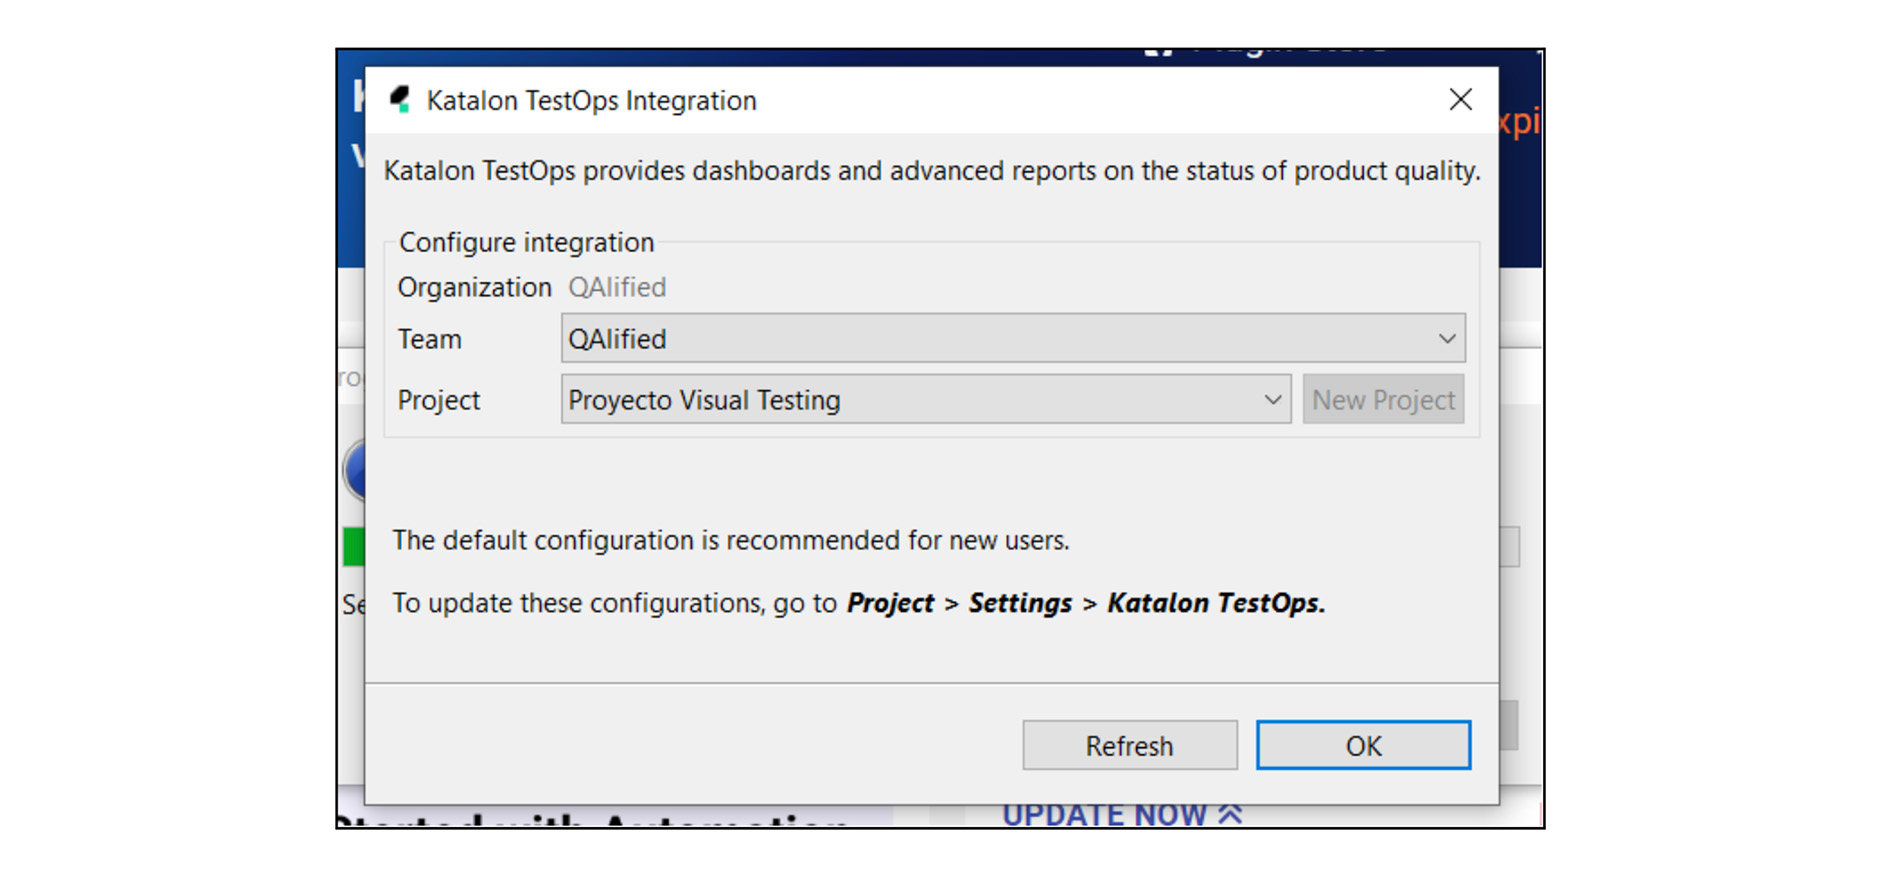
In Katalon Studio, the local project must be created and configured using the project just created on the Katalon Platform. For new projects, this information will appear when the project is created.
For existing projects, you can load or modify this configuration in the project settings: “Project > Project Settings > Katalon Platform”.
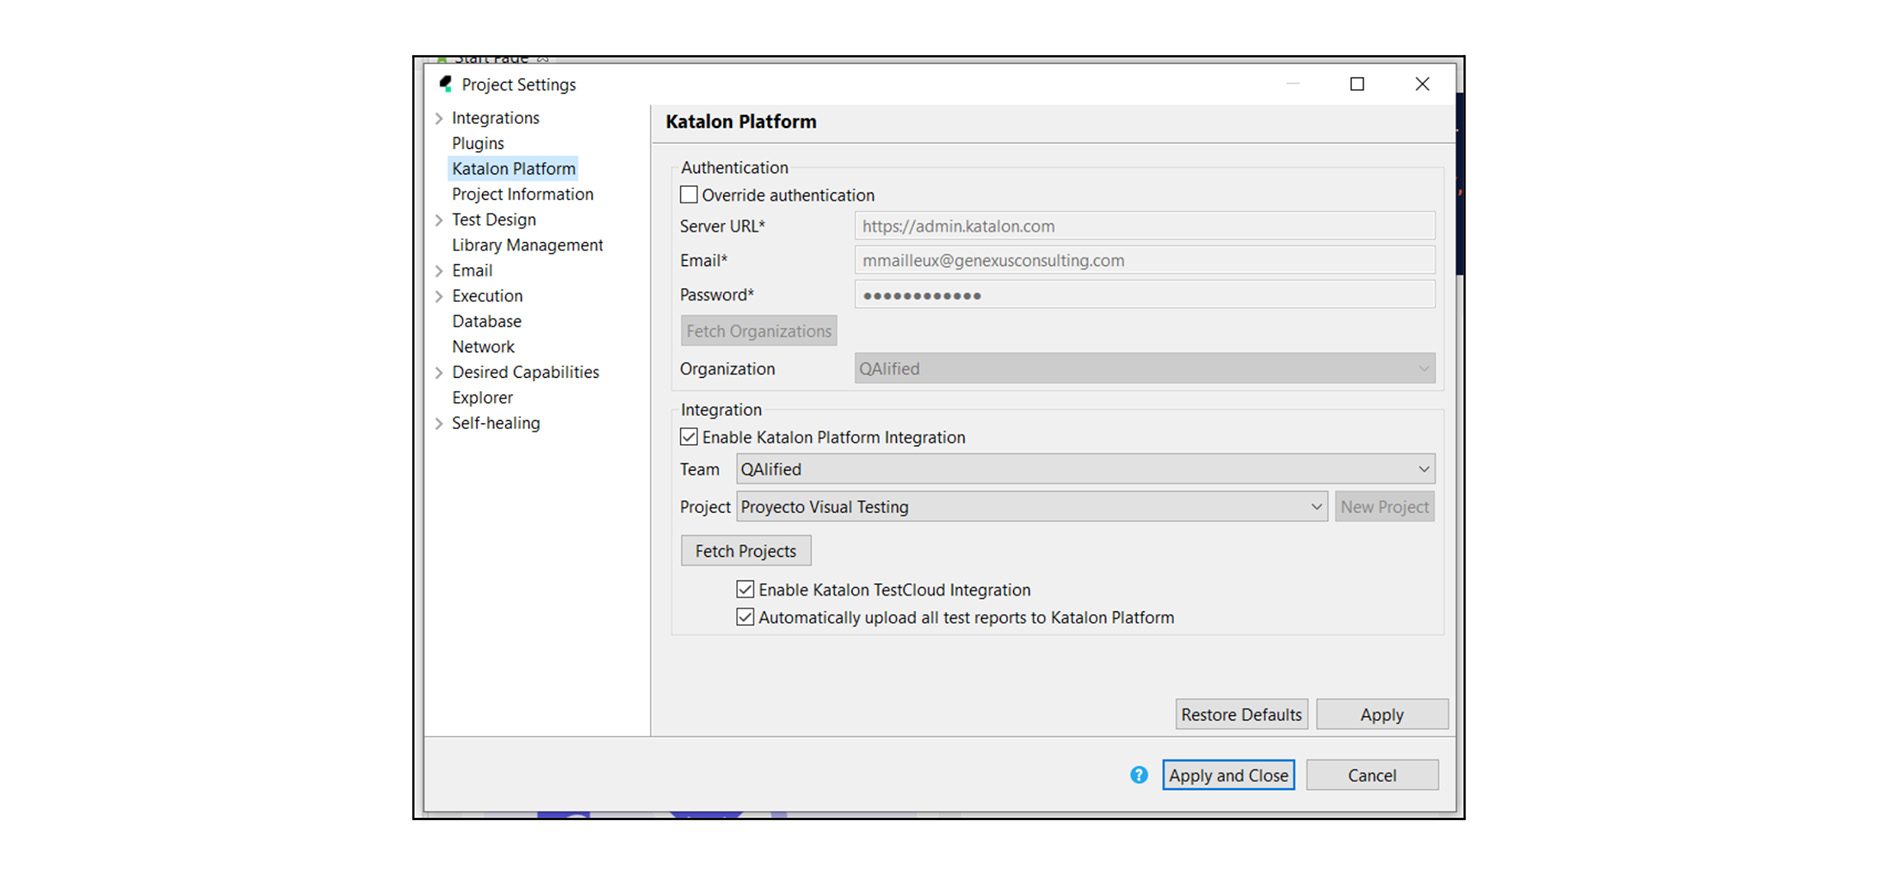
Once the link between the local project (Katalon Studio) and the Katalon Platform has been made, and visual verifications are executed, this information will be sent to the Katalon Platform for processing. The results of each execution can also be visualized and managed directly from the Katalon Platform.
Settings for testing on mobile devices
Katalon can perform visual testing both for web applications running on a desktop browser and on mobile devices, but for different emulators, additional setup is needed.
Installation and setup for Android emulators
To set up an Android emulator, download and use Android Studio. It incorporates the Virtual Device Manager component that allows you to create and manage several emulators quickly and easily.
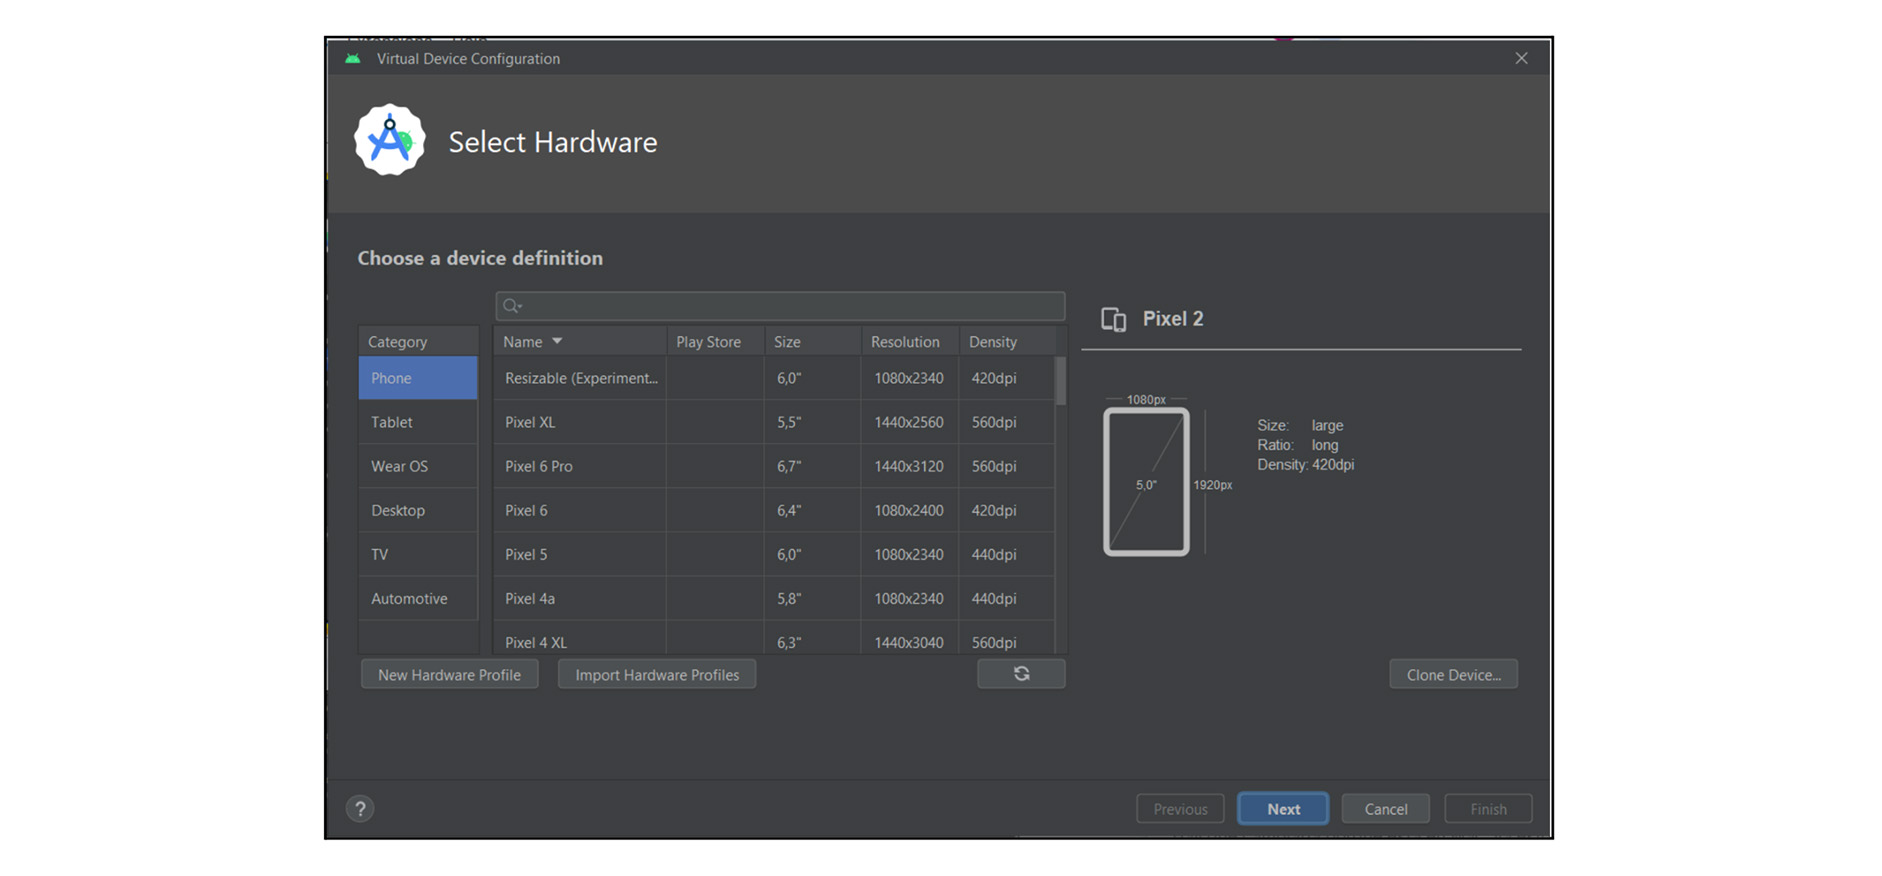
Once Android Studio is installed and running, you can start creating the emulator by clicking on the “More Actions > Virtual Device Manager” option. Select the “Create device” option and follow the steps requested to finish configuring the emulator.

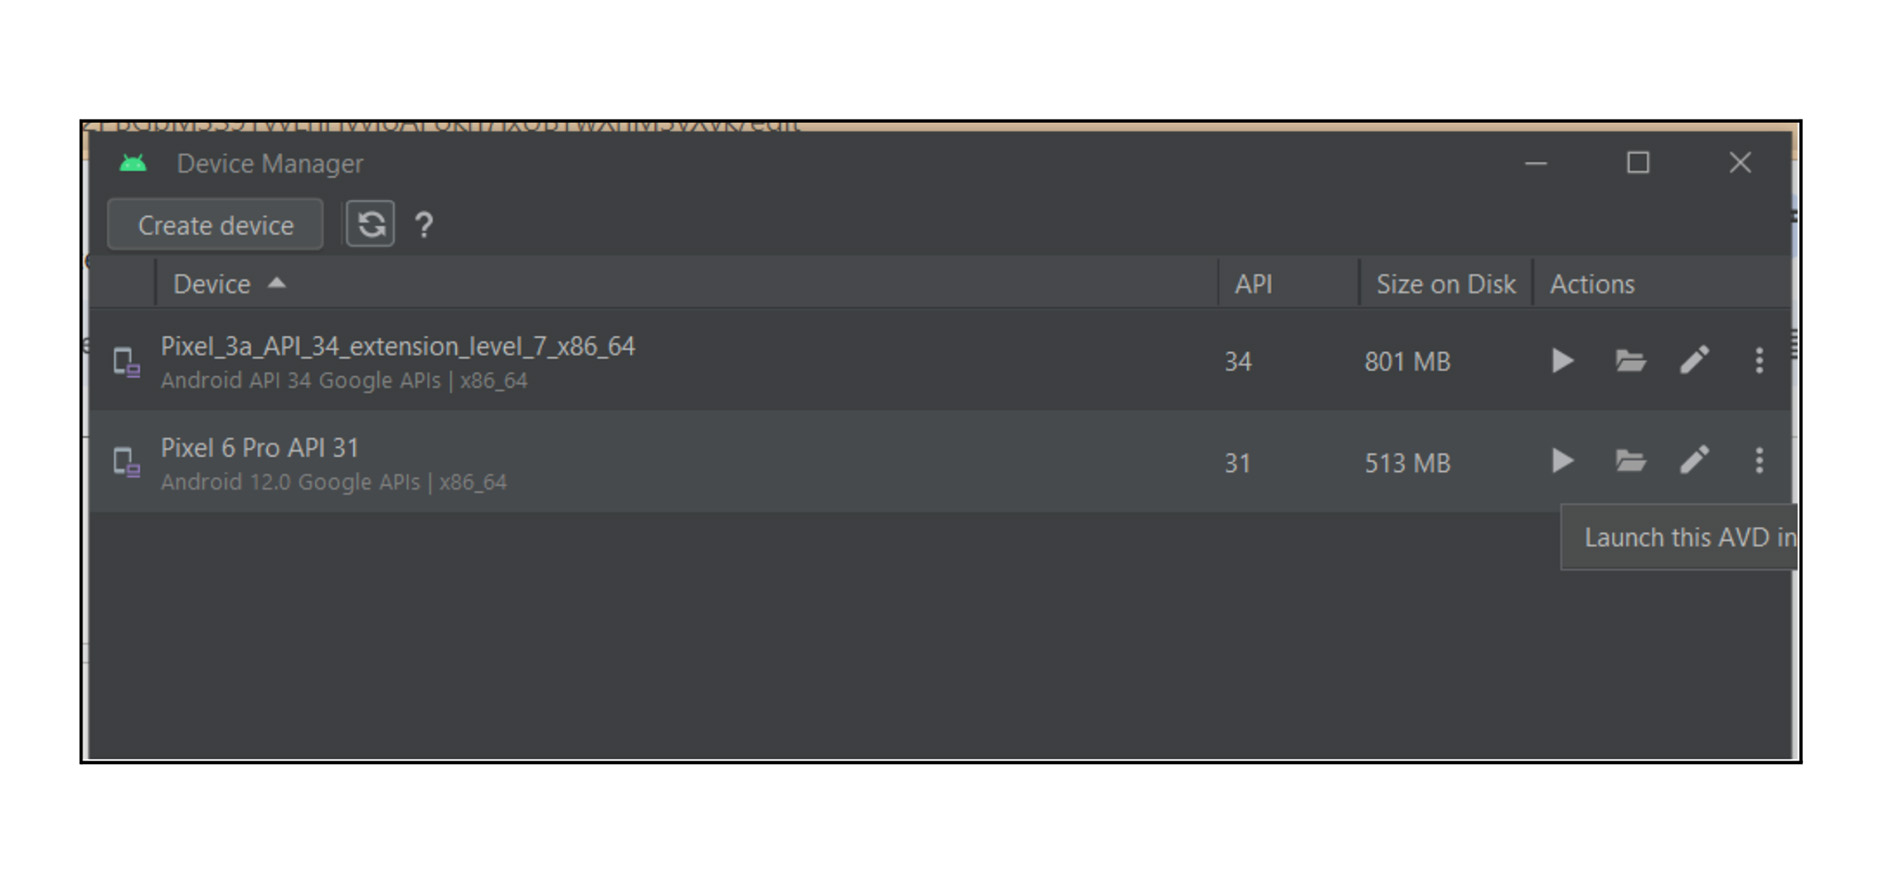
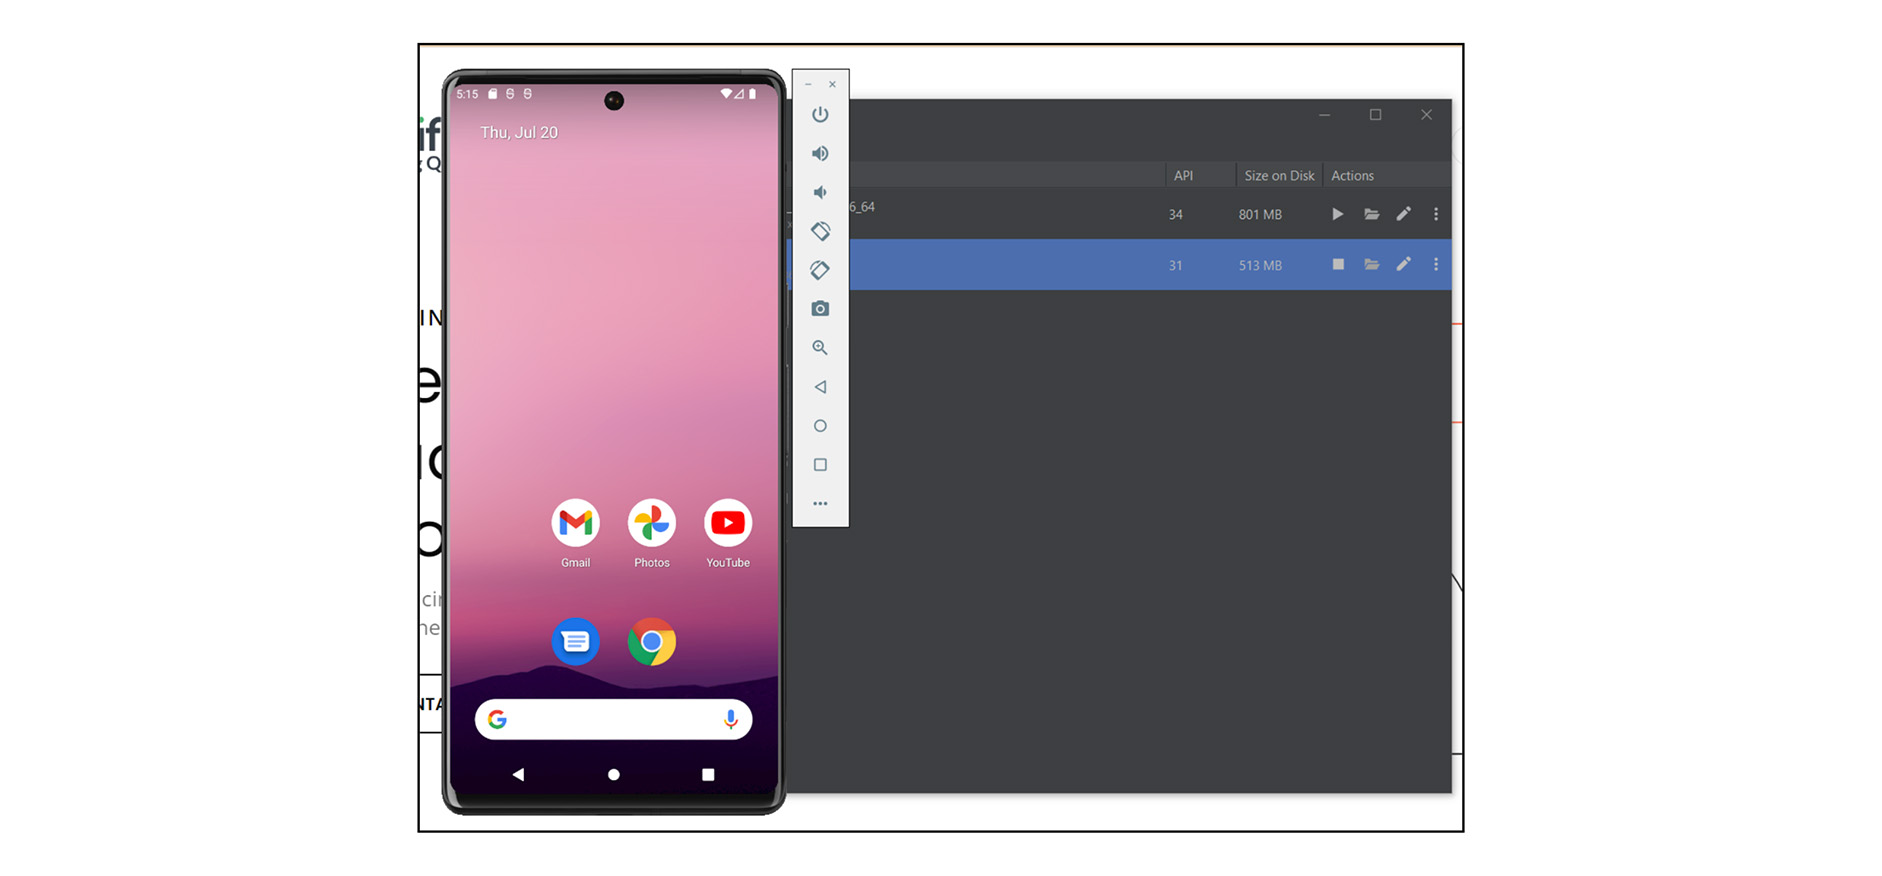
The newly configured device (emulator) will appear in the Device Manager component of Android Studio, selecting the “Launch” action will run and raise the emulator.
Installation and setup for Android emulators
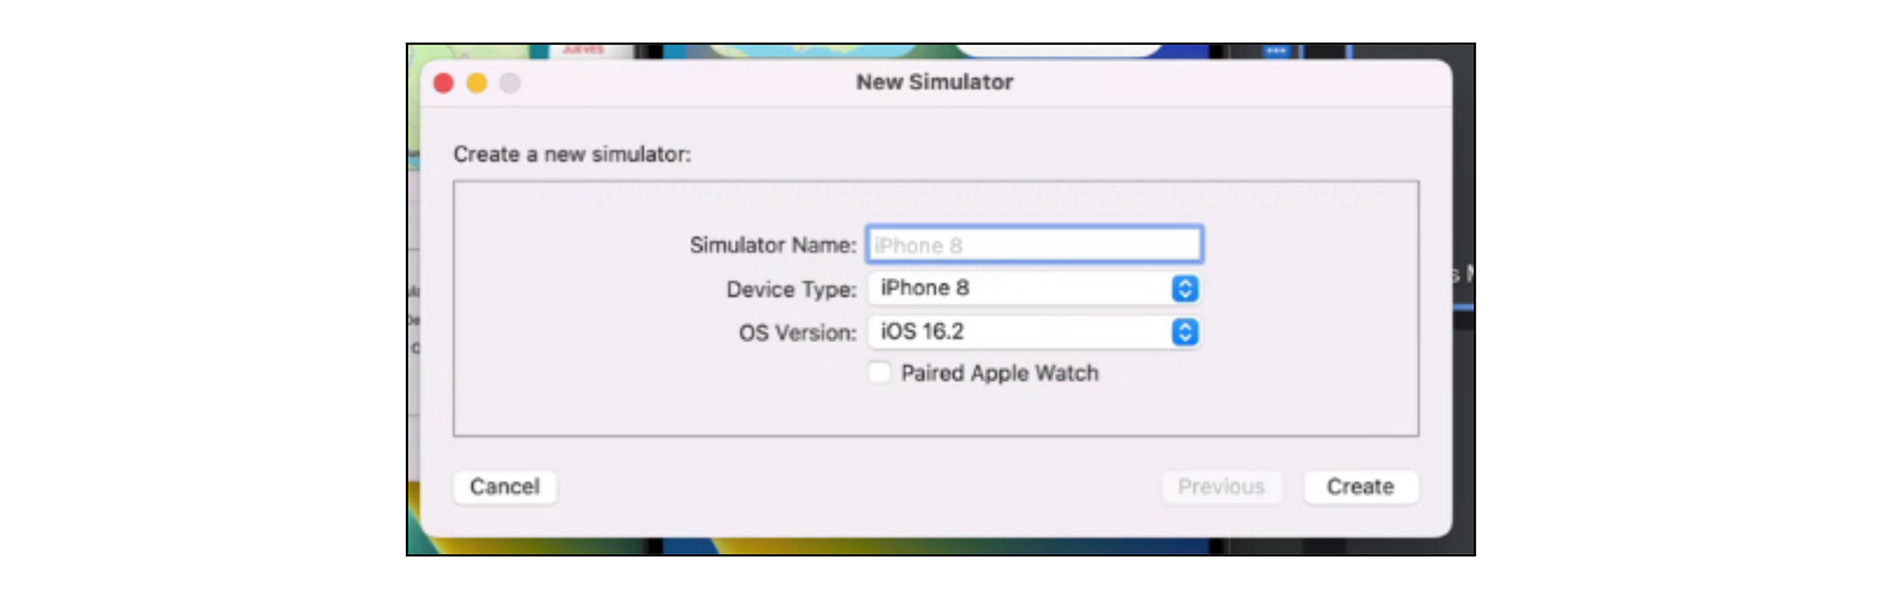
To emulate an iOS device, you will need a MacOS computer and XCode (which is installed by default on MacOS operating systems, but you can download it from the official website). XCode allows you to set up and create emulators for iPhone or iPad devices. To do this, go to “Open Developer Tool > Simulator”.
There you can create a new simulator (New Simulator) by entering the following data: name, device type and iOS version required.
Scripting for Visual Testing
To start with the scripting of the test cases, the first thing to do is to define the pages and/or components that will be part of the scope of the visual tests. That is, to build the scripts and test flows that will be verified by the scripts.
In Katalon Studio, you can automate tests using several commands (Keywords), such as:
- Browse over the system to be tested and its components or pages.
- Interact with the user interface elements, such as activating buttons, filling out fields, clicking on links, etc.
- Performing functional checks, to verify certain interface conditions, its elements and/or information displayed on them.
Furthermore, specific commands for implementing visual testing enable you to take snapshots of the screen or a particular element of it. You can also apply the appropriate checkpoints.
These commands are:
- takeScreenshotAsCheckpoint: Takes a screenshot of the visible section of the UI. Find more information about this keyword here.
- takeFullPageScreenshotAsCheckpoint: Takes a screenshot of the full screen, including all visible and non-visible content. Find more information about this keyword here.
- takeElementScreenshotAsCheckpoint: Takes a screenshot of a selected element. Find more information about this keyword here.
- takeAreaScreenshotAsCheckpoint: Takes a screenshot of a selected area. Find more information about this keyword here.
The following image shows a basic script, as an example of Katalon’s capabilities for visual testing.
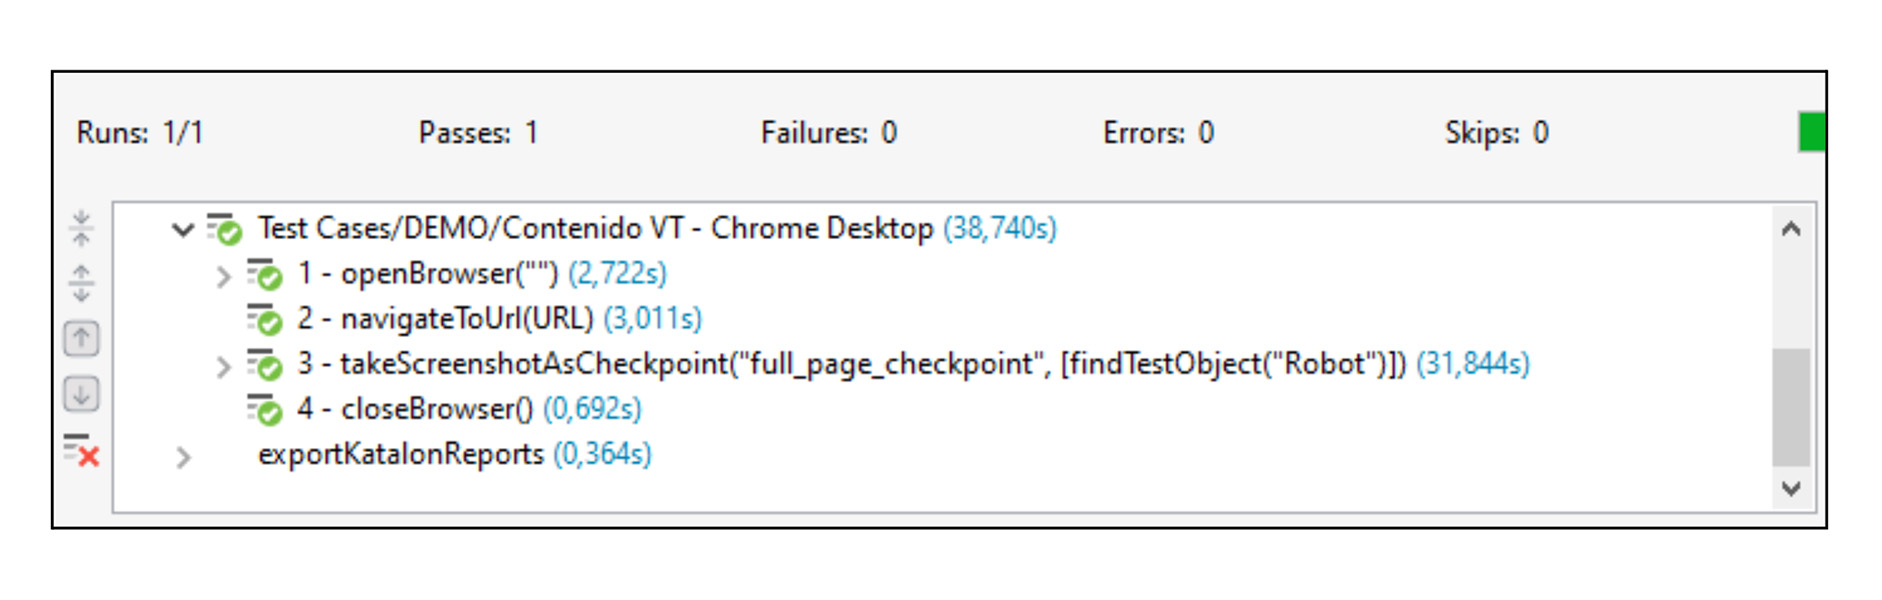
- 1. Open Browser – Open the web browser.
- 2. Navigate To Url – Navigate/access a specific URL.
- 3. Take Full Page Screenshot As Checkpoint – Take a full-page screenshot.
- 4. Close Browser – Close the web browser.
In a nutshell, the above-mentioned script allows you to access the tested system URL from the specified browser, take a screenshot (checkpoint) with the name “full_page_checkpoint” and then close the browser session. A simple script has been generated, which, when run for the first time, will take the screenshot as a baseline and save it in the Katalon platform under the name “full_page_checkpoint”. When executed again and the “Take Full Page Screenshot As Checkpoint” command is triggered, the previously stored baseline image will be compared with the newly captured image.
A second option provided by Katalon is the “Take Screenshot As Checkpoint” command. Unlike the first one, it only takes a screenshot of the visible section in the browser, that is, what you see on the screen.
In turn, Katalon has functionalities to exclude HTML page elements that you do not want to check, elements that are irrelevant for testing, or dynamic objects that will change from one run to the next. Some examples are advertising banners, pop-ups with messages or dynamic information, to name a few. To achieve this, you must set the list of objects (Test Objects) to be ignored as a parameter to the “Take Full Page Screenshot As Checkpoint” feature.
Project organization
The project must be kept organized, as initially all browsers and devices may need to be tested, but as the project progresses, only specific tests may be needed. Organizing the project properly allows this to be accomplished easily.
As the project grows, test cases are likely added, modified or removed. With an organized structure, these changes can be made in an agile and precise way, simplifying the project’s management and adaptation as it evolves.
For this purpose, Katalon provides the following element structures
- Folders
- Test Cases
- Test Suites
- Test Suite Collections
For instance, the project could be organized using different folders that group Test Cases by page or screen to be tested. Each folder contains the Test Cases that will be executed for each device combination.
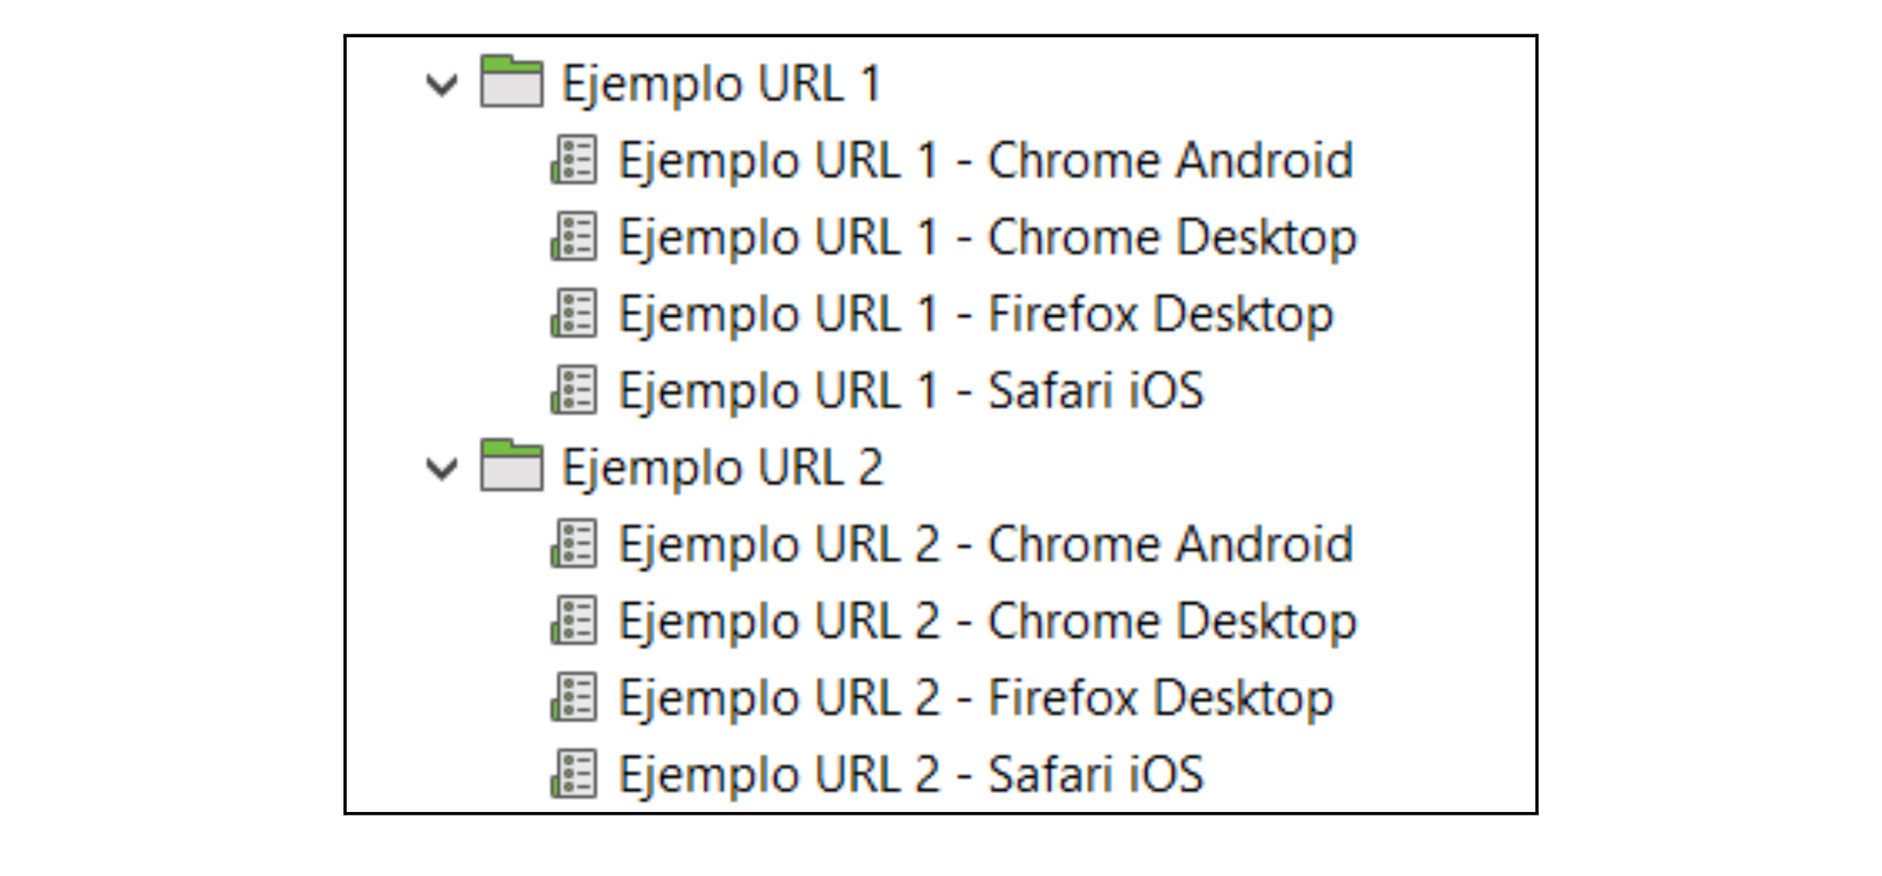
According to the previous example, a Test Suite is created for each combination of device and browser that will be used to execute tests, making it possible to perform and obtain the results in the Katalon Platform grouped by devices and browsers, which greatly facilitates the analysis of the results.
A Test Suite may look like this:
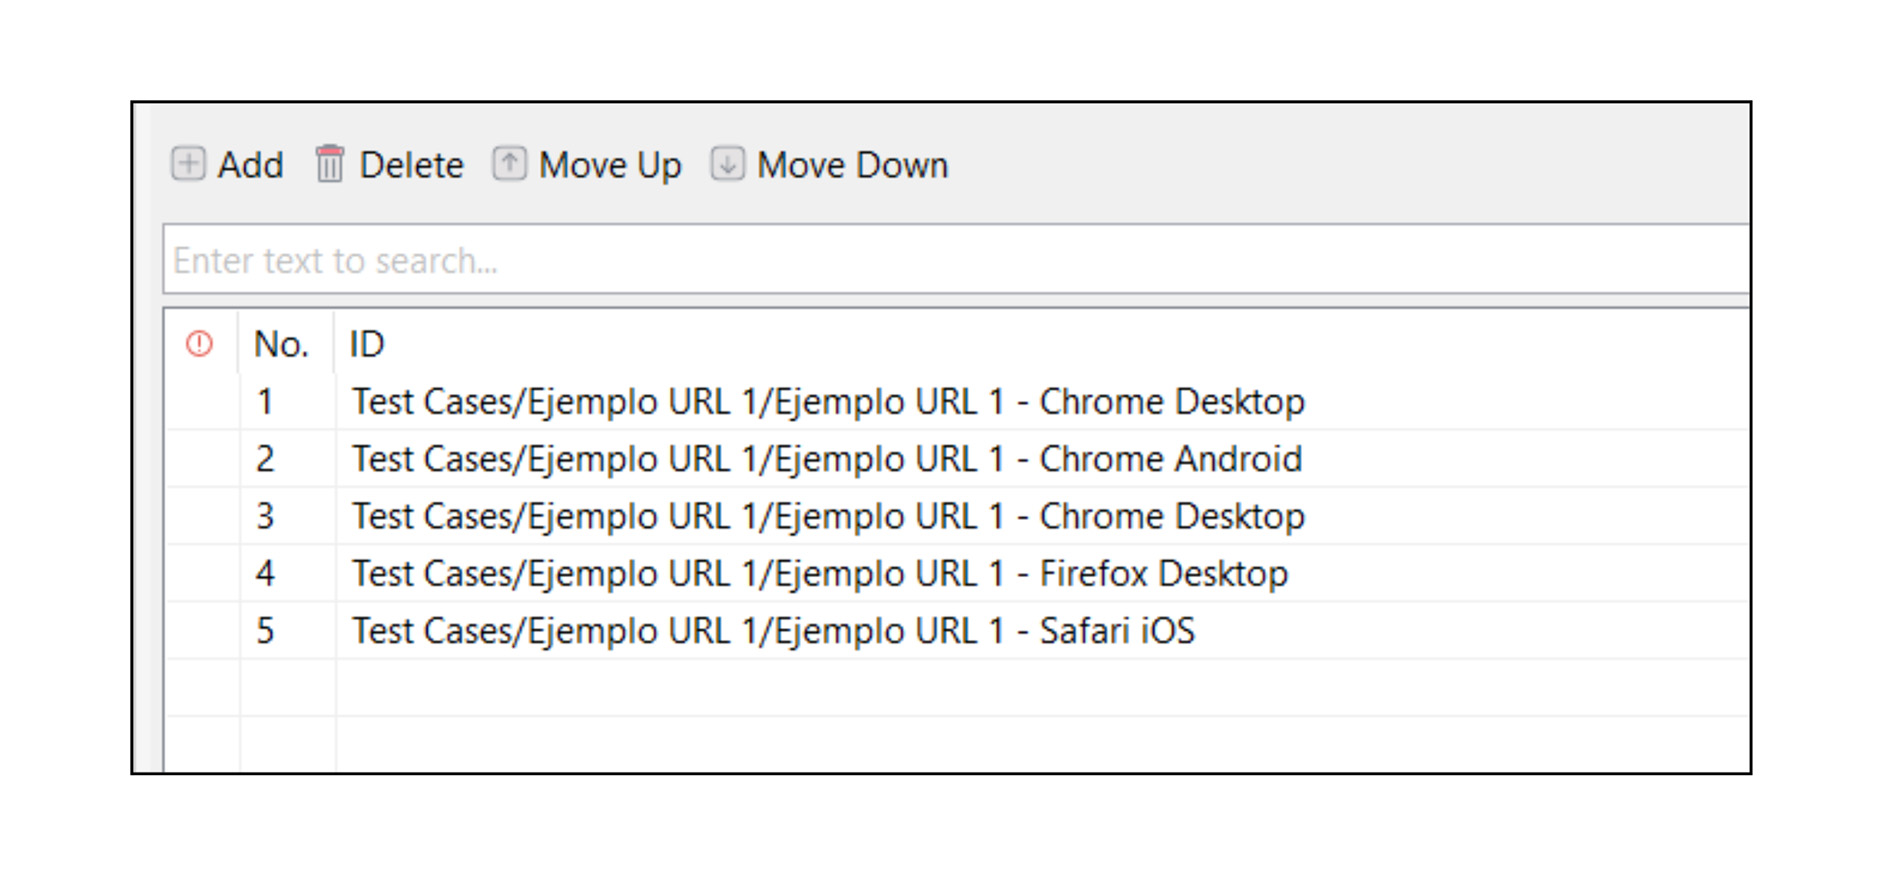
The different Test Suites generated are displayed as follows:
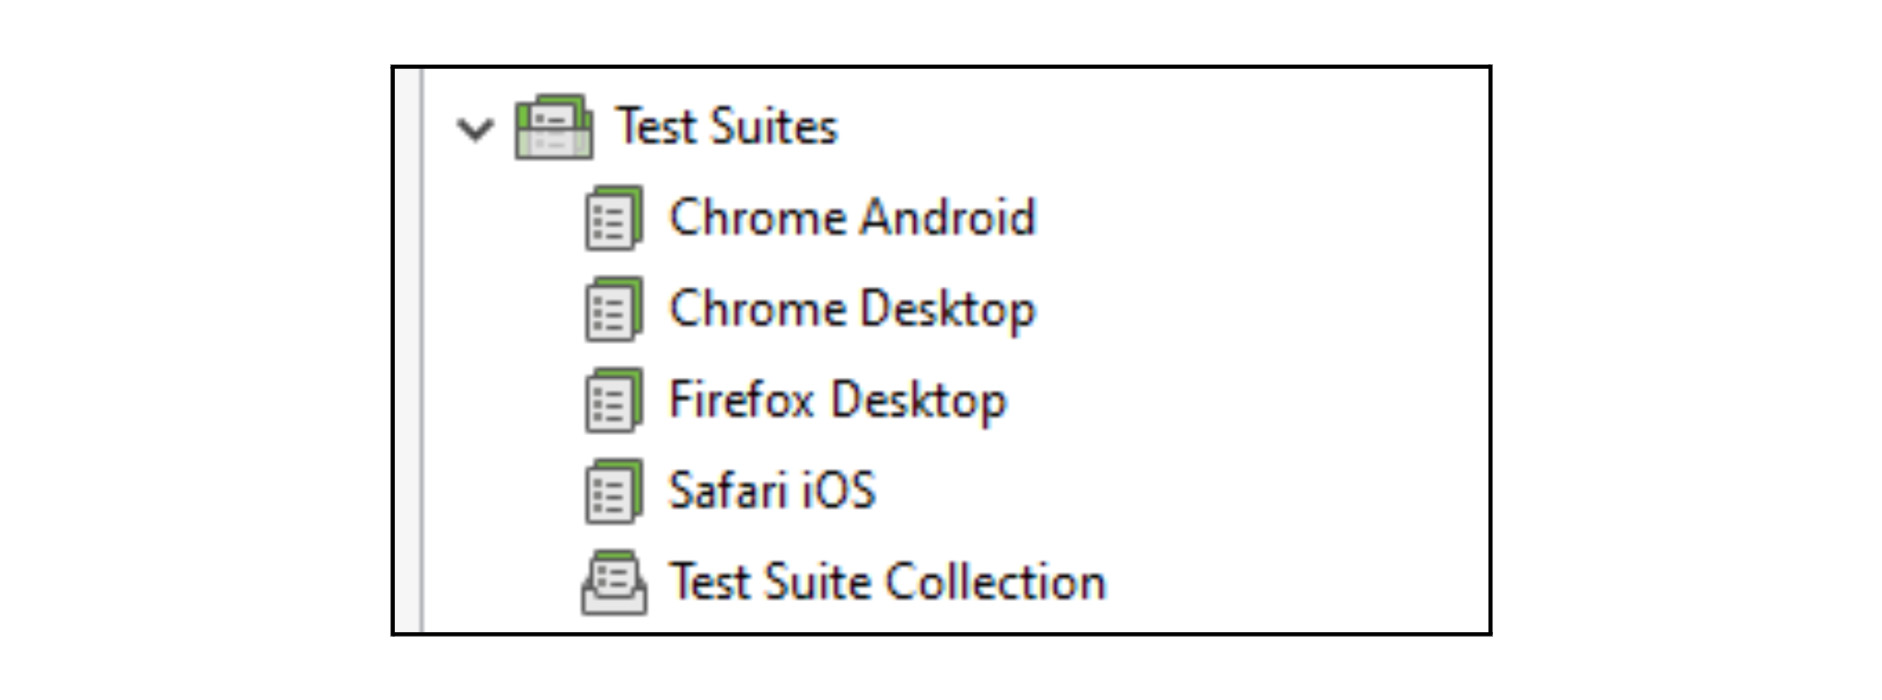
Finally, a Test Suite Collection is created to execute all the Test Suites defined in it. Each Test Suite Collection is configured to be executed with a specific browser and device, which enables a single execution for all tests.
It is important to remember that the appropriate emulators have to be configured and launched for this purpose.
The Test Suite Collection setup is displayed as follows:

Test execution
Execution from Katalon Studio
When running the tests, you must first verify that all the devices on which they will be run are actually enabled. It is also recommended to check the Test Suite Collection to assure that the tests have been configured correctly.
Finally, to proceed with the execution, click on the “Execute” button of the Test Suite Collection. This will start executing all the Test Suites, showing the execution progress in the Katalon Studio Log Viewer.
The following example shows the steps of the executed script and how the report is exported to the Katalon Platform. At this point, you can access the Katalon Platform and enter the project to visualize the results.
Note that when running the tests from Katalon Studio, a new baseline cannot be generated, and must be generated manually from the Katalon Platform as detailed below.
Execution from the Katalon Platform
Katalon’s main advantages for the execution of visual tests from the Katalon Platform are the ability to easily schedule multiple executions and to generate new baselines automatically on demand.
To execute from the Katalon Platform, the following settings must be completed:
- Store the Katalon project in a Git repository (Github, Gitlab, Azure DevOps, etc.) and configure a “Script Repository” in the platform including access to it (find more information here: link).
- Configure the Katalon agent on the local computer hosting the emulators (find more information here: link).
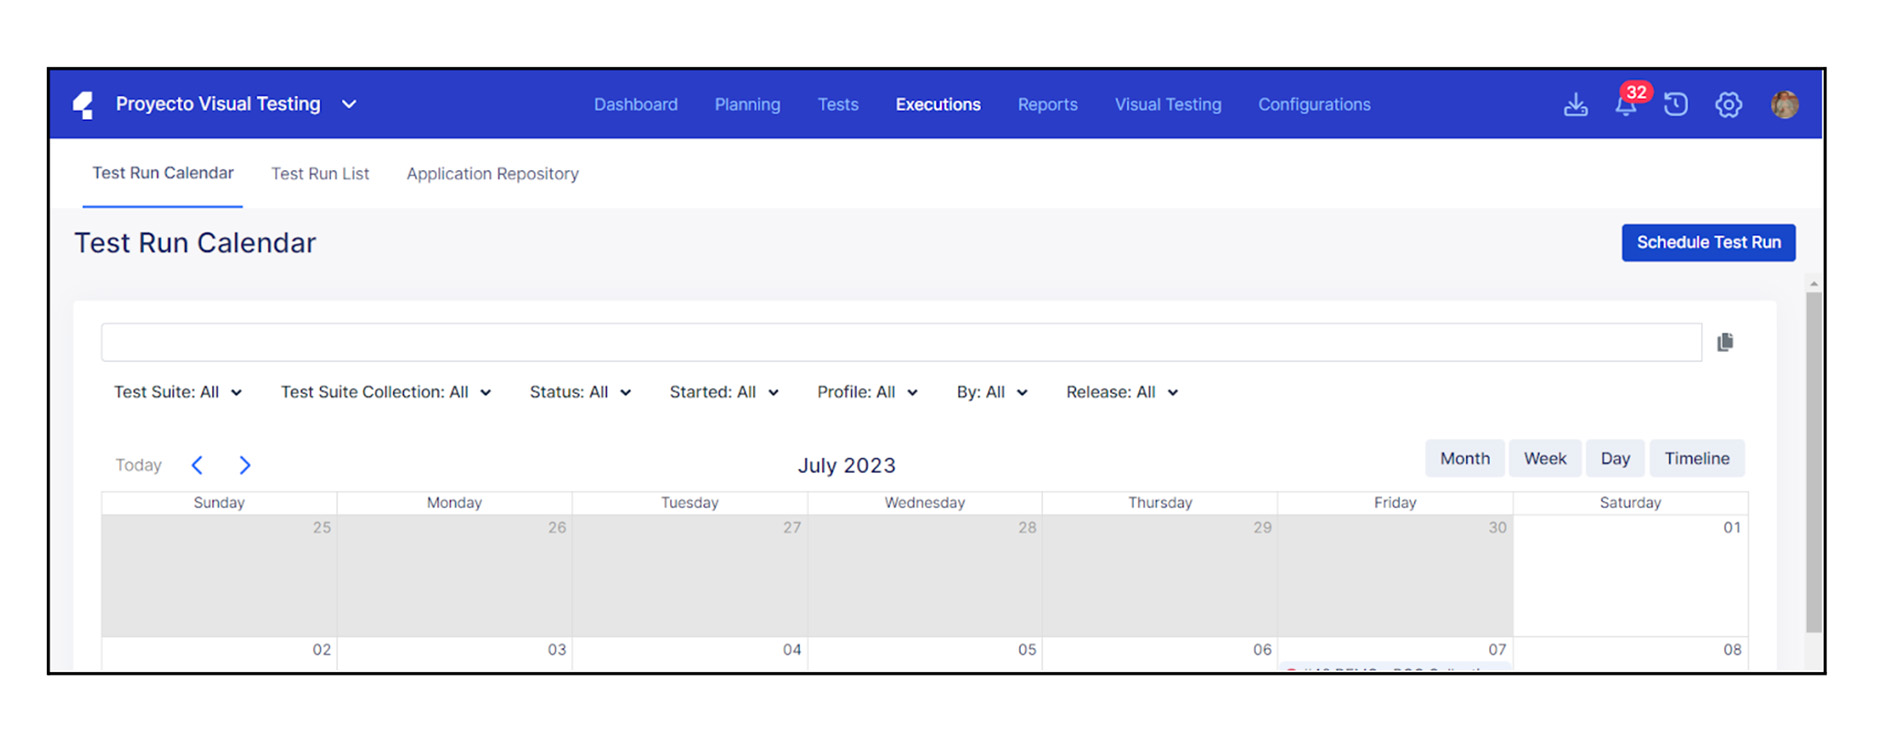
- Schedule the execution (Test Run) from the “Executions” section in the Katalon Platform (find more information here: link). Within the “Executions” section, you can schedule the runs using the “Schedule Test Run” option.
 Clicking on this option displays the following form to configure the execution. Here you can set the date and time of execution, the project to be executed (from the “Script Repository”), the execution environment, the Test Suite, and other options.
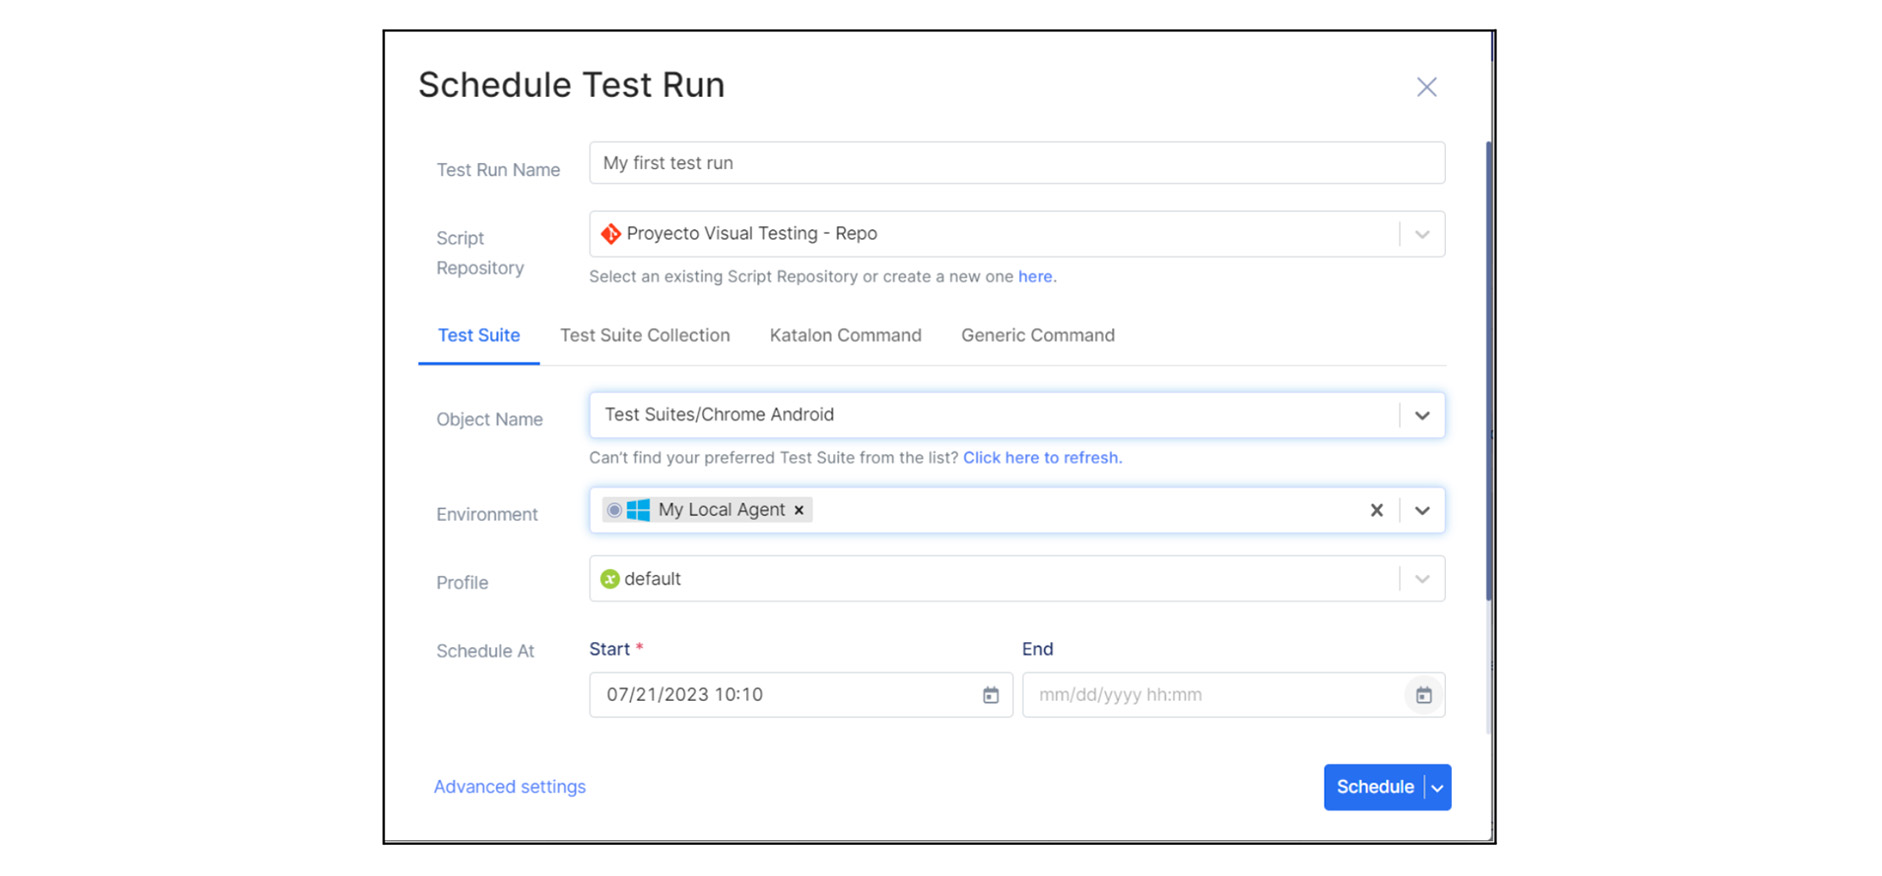
When “Schedule” is selected, the execution will be confirmed and at the indicated date/time it will start running the tests using the local environment, as it contains the emulators.
Working with baseline collections from the Katalon Platform
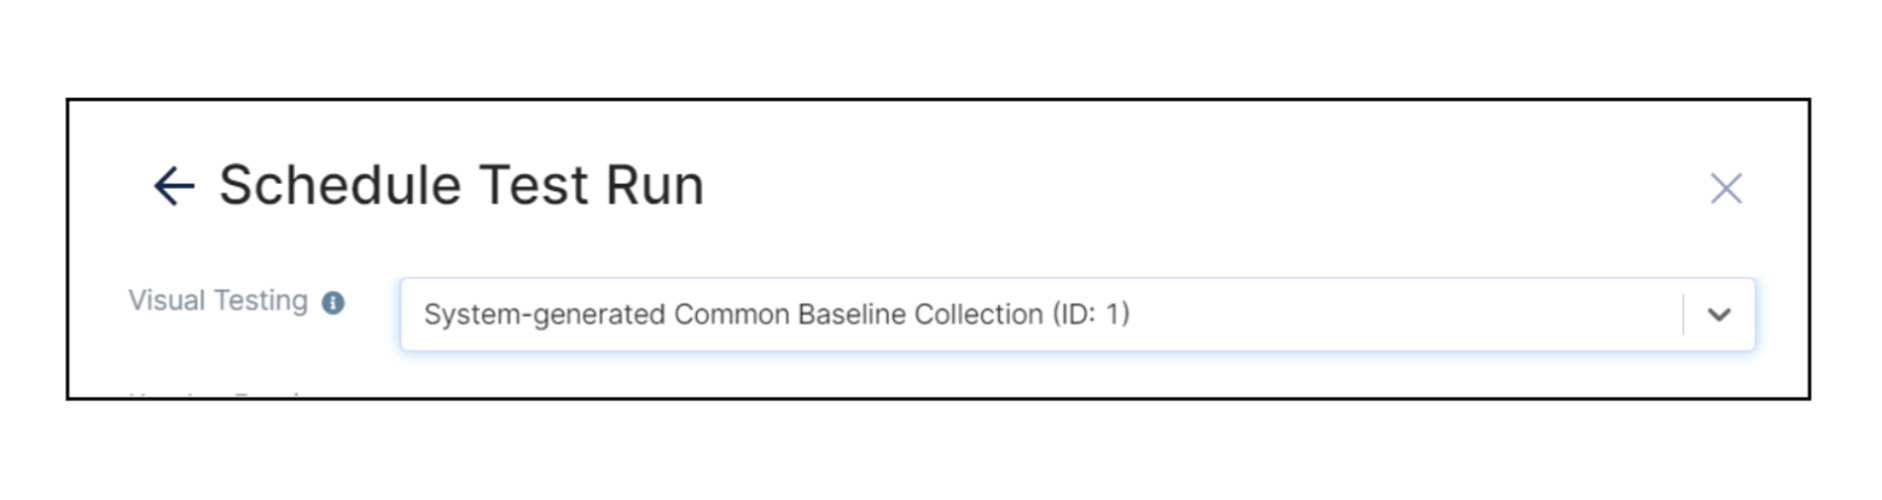
On the “Schedule Test Run” screen, in the advanced options, you can specify the baseline collection to be compared with the one you want to run.
This allows you to keep several collections and use them as appropriate, either when testing multiple versions of the system or due to visual differences between test environments, among others.
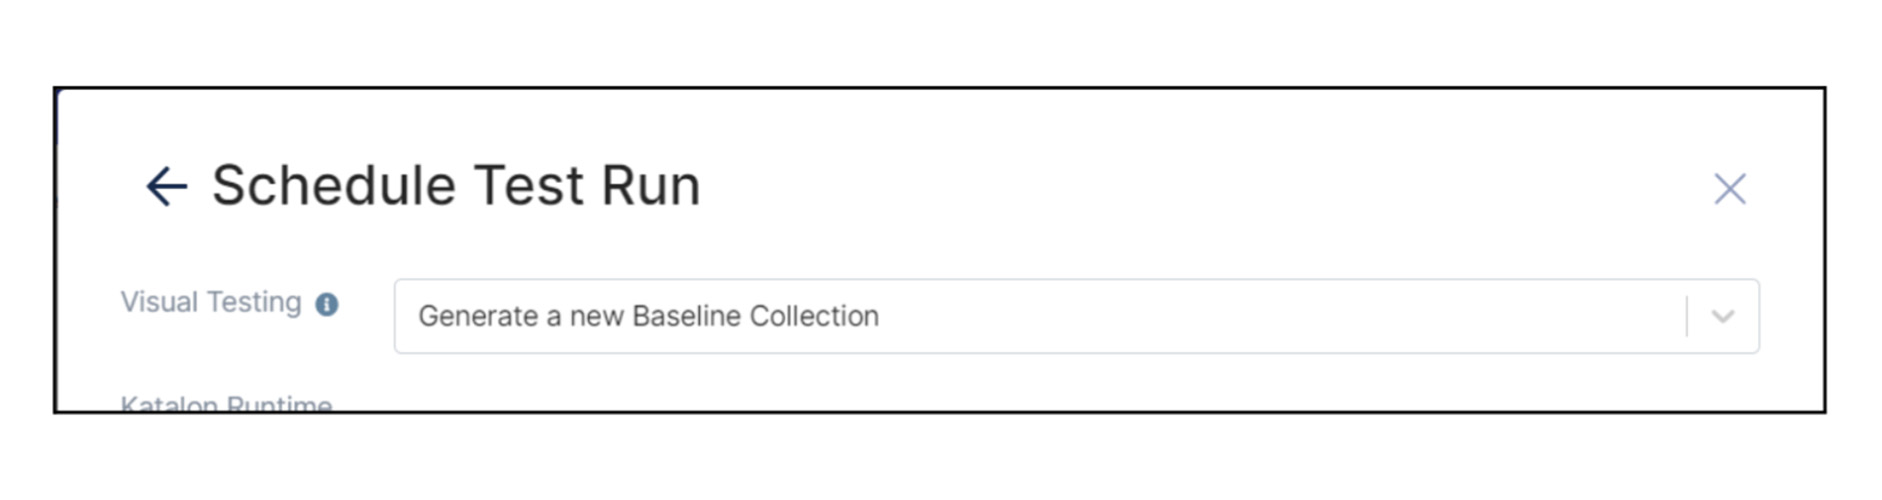
A new baseline collection can also be generated at this point. This prompts the Katalon Platform to generate a new baseline collection containing the new snapshots during that execution.
Results Report
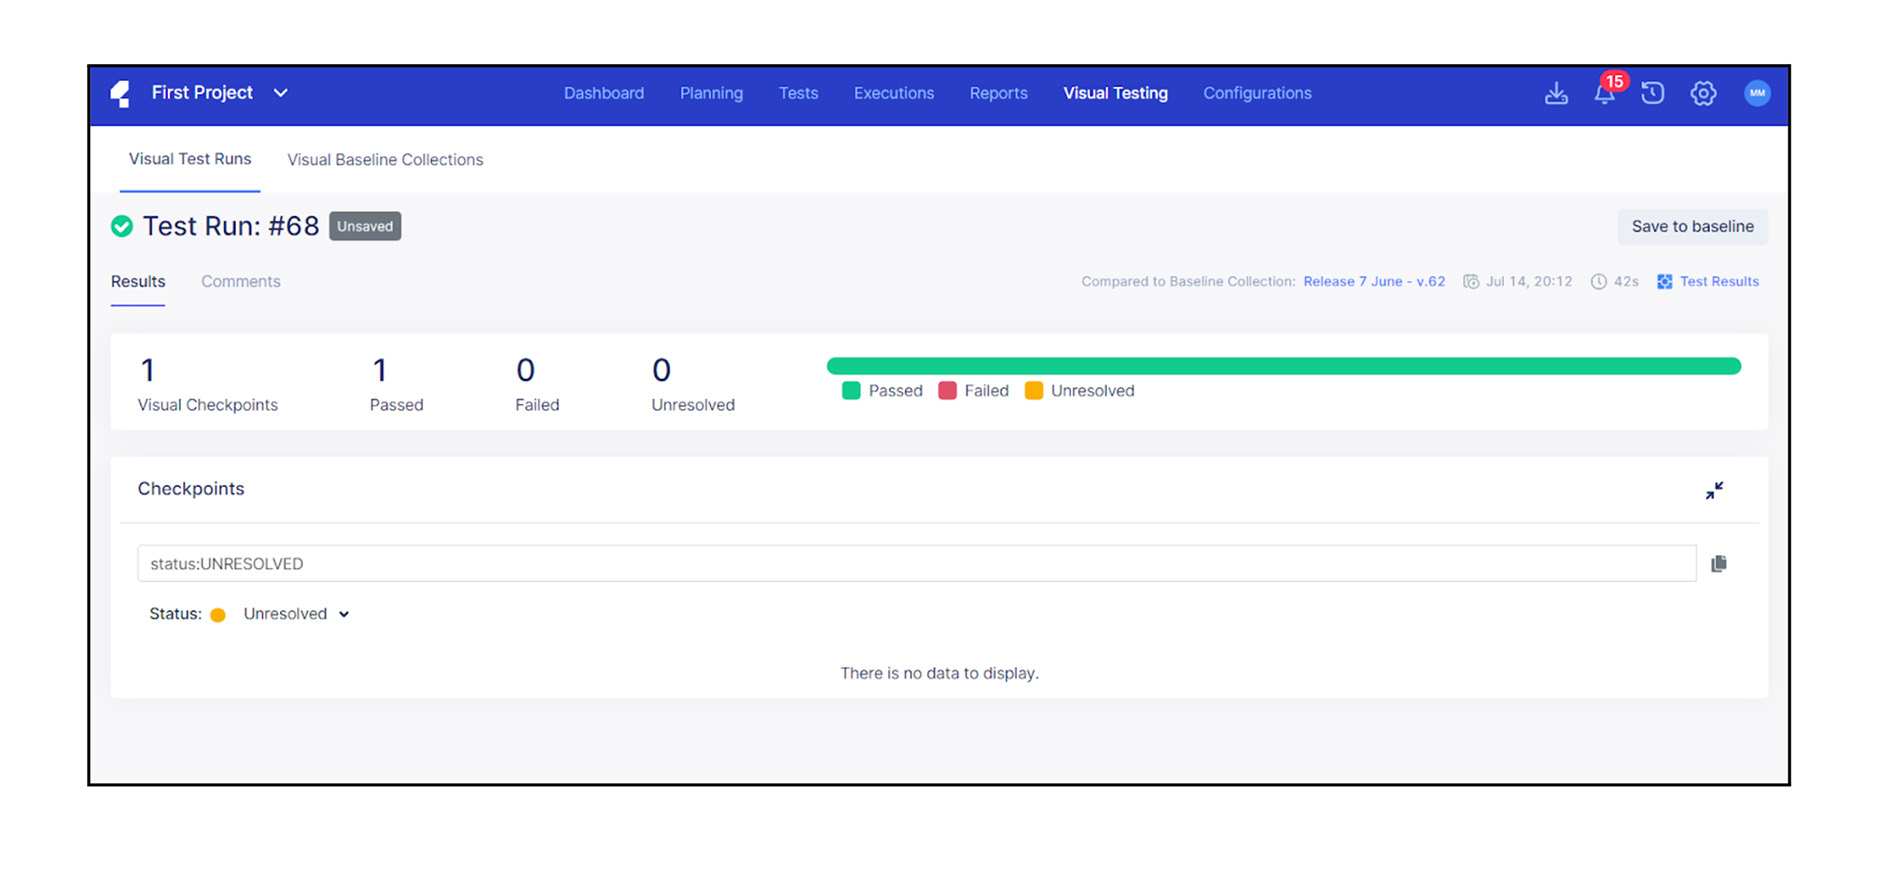
The execution results can only be viewed through the Katalon Platform in the Visual Testing section, where each execution is identified with a unique ID.
 When selecting a run, all the captures generated in it (checkpoints) are shown. When selecting and opening the detail of a checkpoint, the baseline is displayed on the left side of the screen and the checkpoint on the right side.
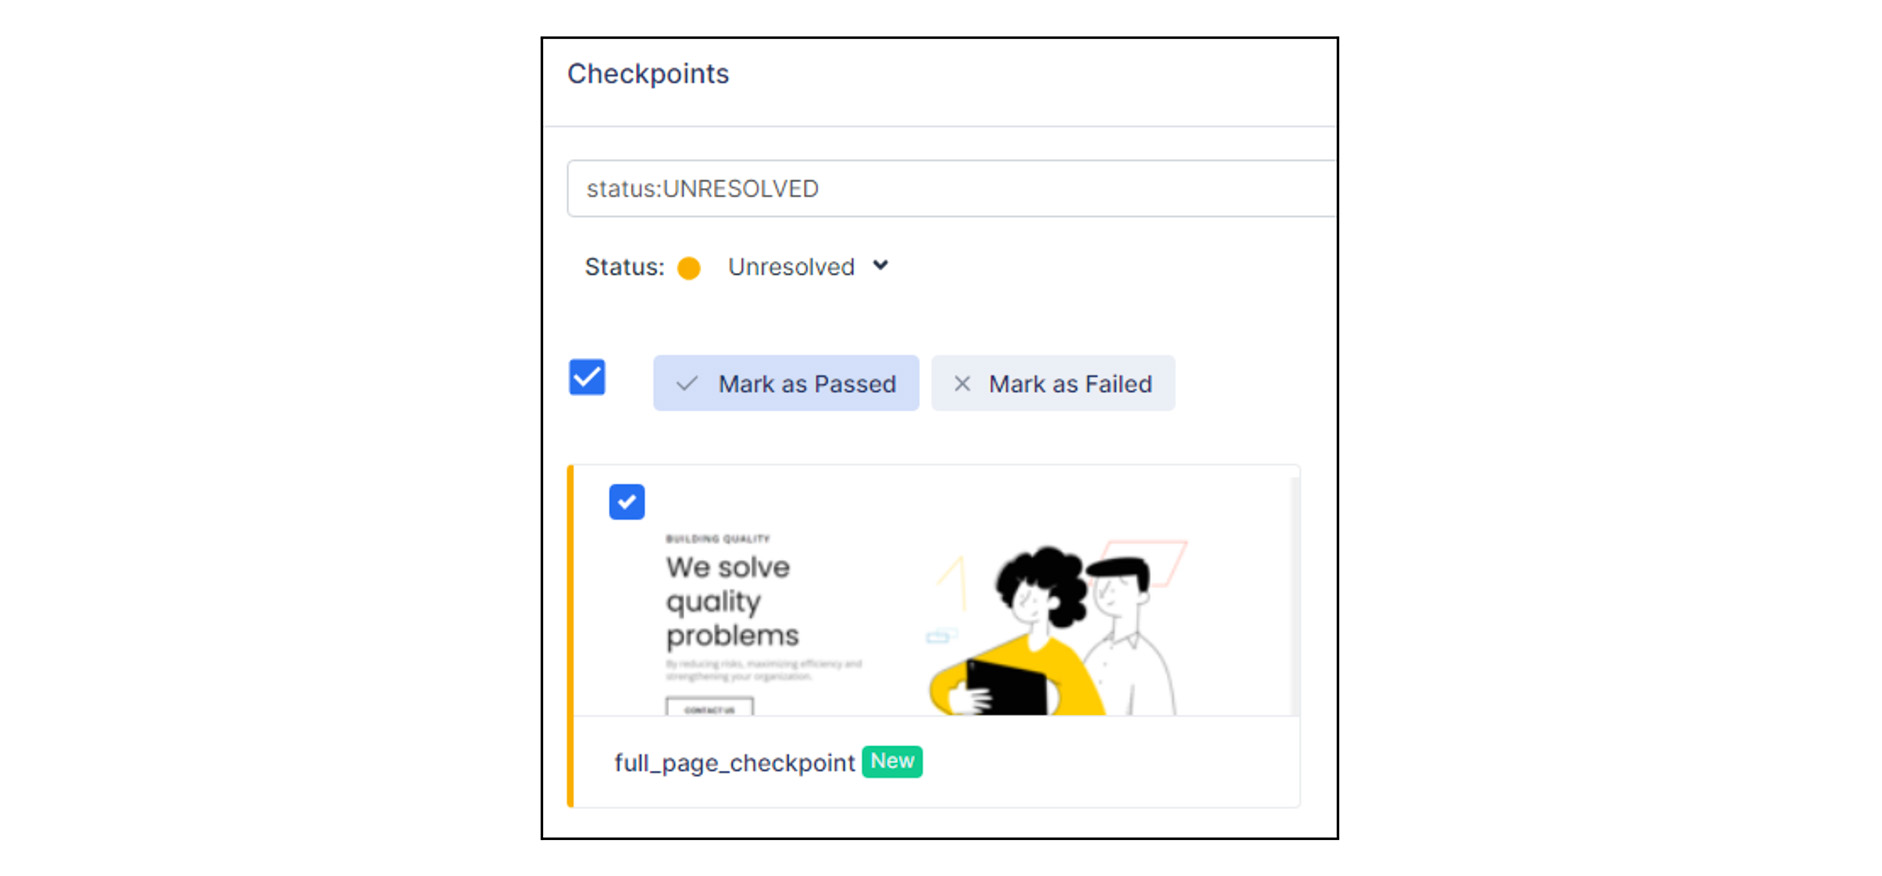
Katalon will mark a checkpoint as PASSED if there are no differences detected, while it will mark it as UNRESOLVED if differences are found.
It is also possible to set the tolerance threshold, and the comparison method, as well as to manually set the test result (FAILED, PASSED, UNRESOLVED).
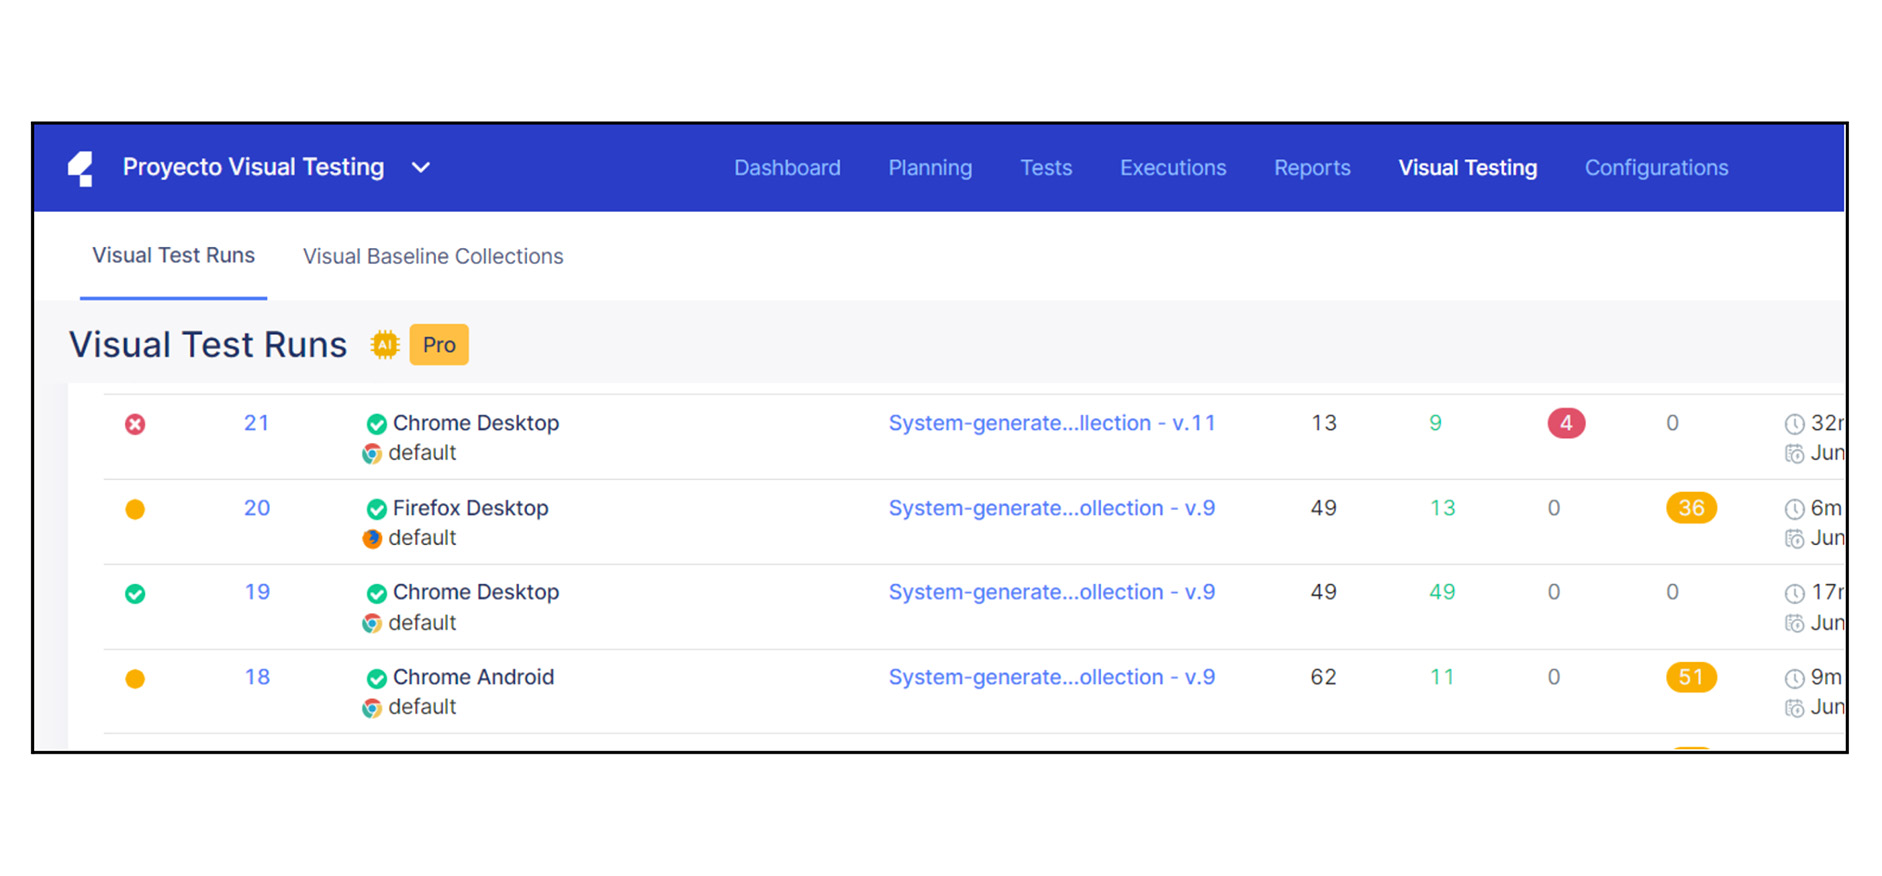
 Based on this, you can see the number of passed and/or failed cases. Back to the Visual Testing section, you can view all the runs together and their results and metrics.
Adding images to the baseline collection
On the same results screen, successful comparisons (marked PASSED) can be added to the baseline collection, so that Katalon automatically updates the screenshot versions. By selecting the “Save to Baseline” option, Katalon will generate a new baseline version with these captures.
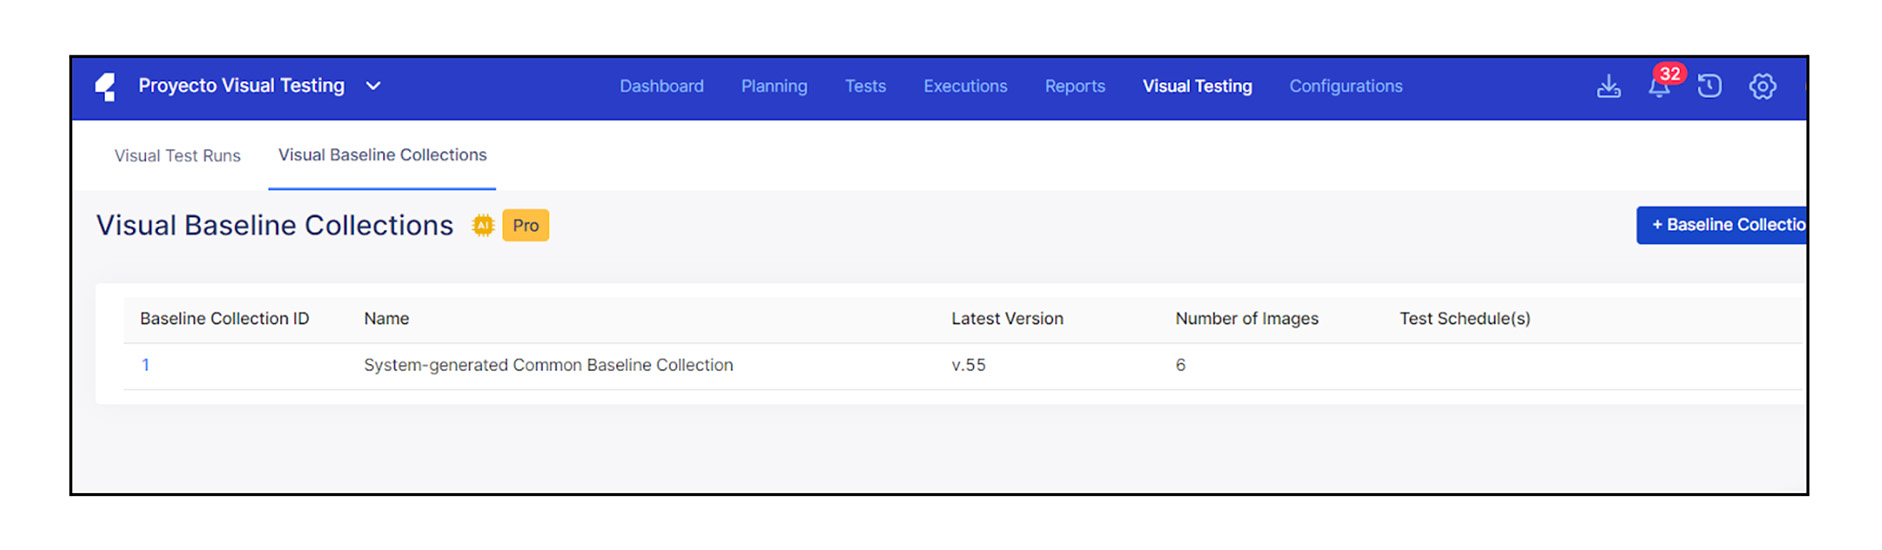
 In the “Visual Baseline Collections” section, all created collections are displayed, along with their respective versions and images. When opening a specific collection, the images contained in it can be viewed and deleted.
How are the different comparison methods displayed?
As previously mentioned, there are three comparison methods. Here is an example of how each of them works for the same test.
Pixel-based comparison
 Layout-based comparison
 Text content-based comparison:
Conclusions
Approaching an automated visual testing strategy can be a great tool for projects, since it allows you to easily and quickly detect UI inconsistencies or bugs with great accuracy.
Katalon stands as a powerful alternative for visual testing, both for web and mobile application contexts. Accelerating the UI testing process by capturing and storing reference images provides a solid foundation for accurate comparisons in future development iterations. This allows development and testing teams to identify any visual deviations at an early stage, saving time and resources before they become more costly.
Incorporating visual testing into projects increases coverage and confidence in product quality. By combining automation and accuracy, quality standards are boosted and users are provided with a consistent experience.
SHARE:

